3 Methods to Connect and Access Windows 365 Cloud PC
In this guide, you’ll learn how to access Windows 365 Cloud PC using multiple methods. You can connect to a cloud PC using the Windows 365 home page, the Windows 365 App, or the Microsoft Remote Desktop client.
After you assign Windows 365 licenses to Cloud PC users, users should be able to access their Cloud PCs. Note that you should also provision Windows 365 Cloud PCs that allow users to access them from any device.
A Cloud PC is a highly available, optimized, and scalable virtual machine that provides end users with a rich Windows desktop experience. It’s hosted on the Windows 365 service and is accessible from anywhere on any device.
Cloud PCs are created automatically by the Windows 365 service when a Windows 365 license is given to an end user in the right Azure AD user group.
Also Read: How to create Windows 11 VM in Azure Portal
Note: Mobile devices aren’t currently supported for using a browser to open Cloud PC. In other words, you cannot use your mobile device to access Windows 365 Cloud PC. Only the Remote Desktop app is supported on mobile devices.
Table of Contents
Different ways to Connect to a Cloud PC Remotely
There are different ways in which Microsoft allows you to connect and access Windows365 Cloud PC.
- Use Windows 365 App to connect to a Cloud PC from Windows 11
- Access Windows 365 Cloud PC using browser
- Access Cloud PCs using Microsoft Remote Desktop client
In this article, I will show you all the methods to access the Cloud PC.
Method 1: Connect to Cloud PC using Windows 365 App
The Windows 365 app provides a direct path to Windows 365 from the Task Bar or Start menu with a personal, customized experience that can be tailored to each individual. You can access Windows 365 Cloud PC directly from your taskbar or start menu.
The new Windows 365 App will integrate more closely with Windows 11, making your cloud PCs desktop available right in the taskbar, as if it were a virtual desktop on your PC. Microsoft had previously hinted at this, but the Windows 365 app is now available in Microsoft Store for testing.
You can also download the Windows 365 app directly from windows365.microsoft.com. Soon, the Windows 365 app will ship as part of Windows 11, so it will be pre-installed without any need to download from the Microsoft Store or windows365.microsoft.com.
Download and Install Windows 365 App from Microsoft Store
To connect to a Cloud PC using the Windows 365 app, you must first download the app and install it. Microsoft recommends uninstalling the Remote Desktop app before installing the Windows 365 app.
Use the following steps to get the Windows 365 App from Microsoft store:
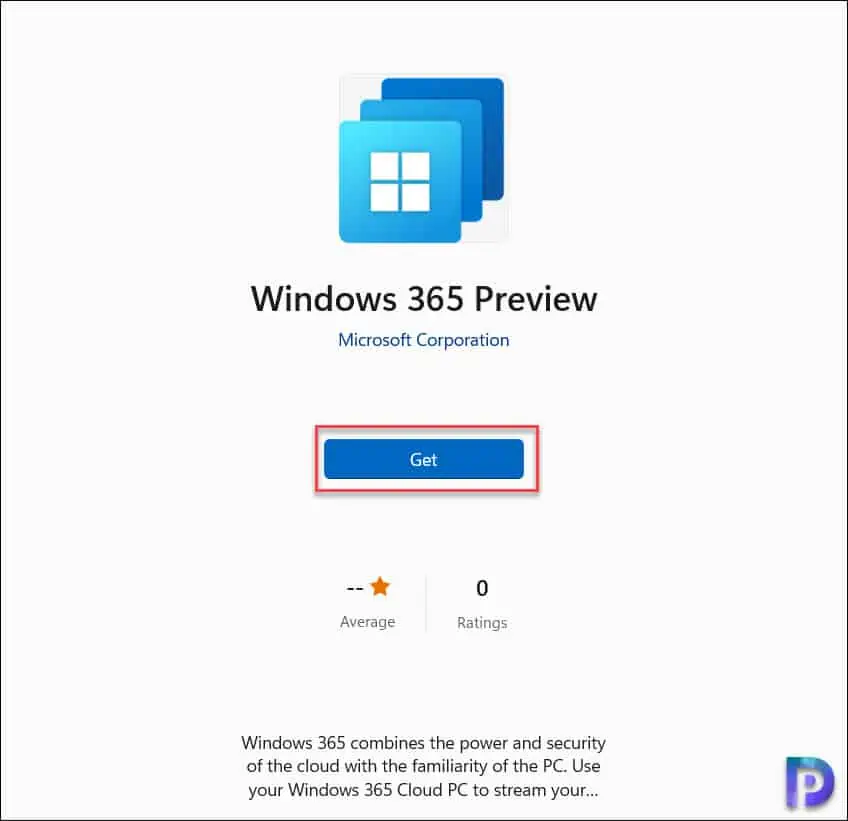
- Open the Microsoft Store app.
- Search for “Windows 365.”
- Select Get to install the app.
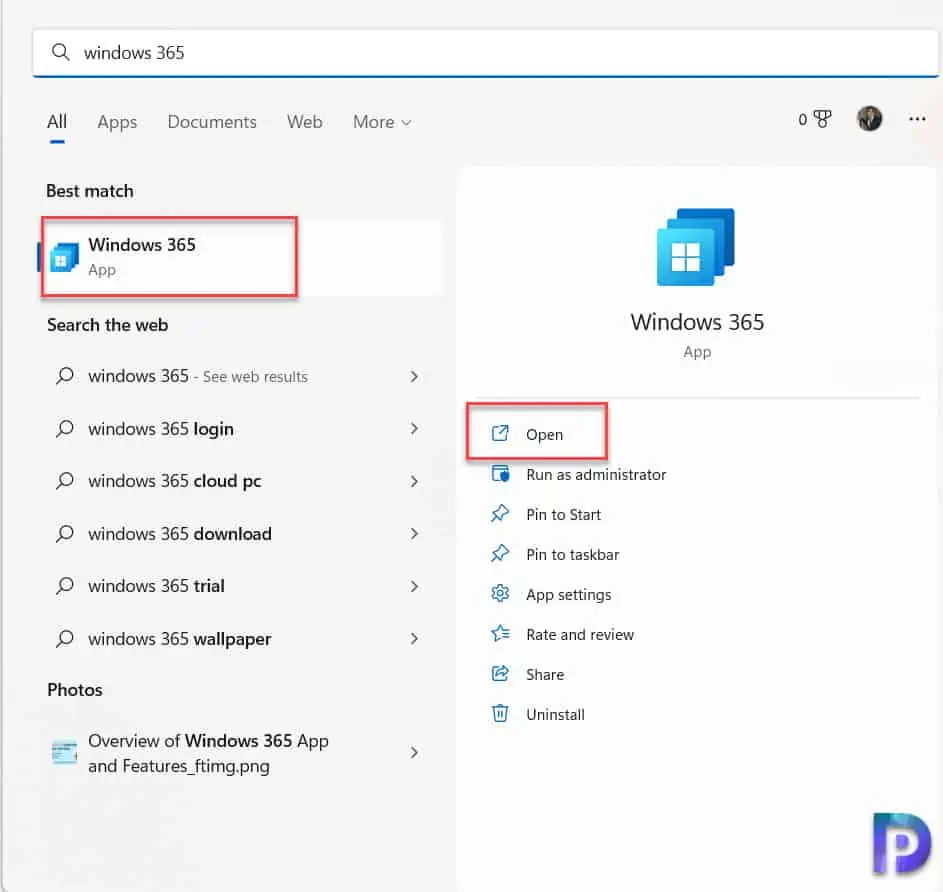
When the download is complete, select Open to launch the app.
Access Cloud PC using Windows 365 App
After you download and install the Windows 365 app, you can now access the Cloud PCs with this app directly from your taskbar or start menu. Launch the Windows 365 app on your PC and sign in with the credentials.
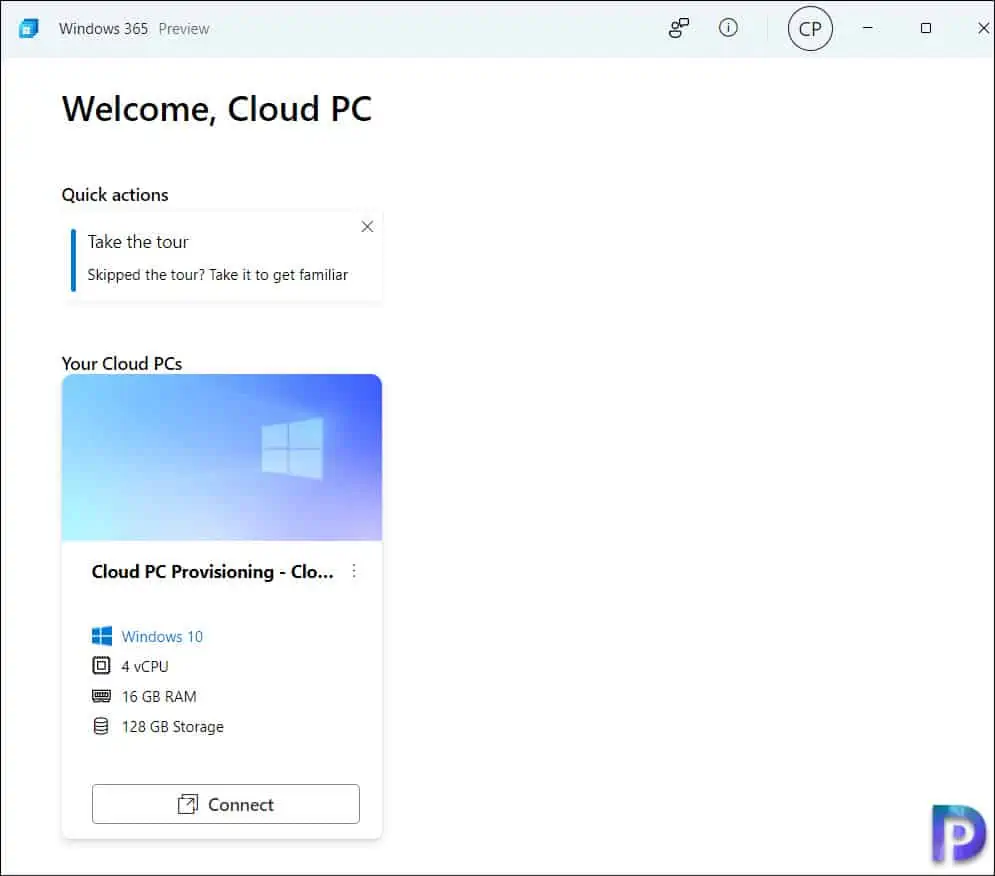
After you have signed-in to Windows 365 app, you can see the Cloud PC assigned to the user. On the Welcome Cloud PC window, you can see the hardware specs of the cloud PC and there is a connect button. To connect to the Cloud PC from Windows 365 app, click on the Connect button. You will need to sign in again to access to the Cloud PC. Once the authentication is successful, you can access the Cloud PC.
Method 2: Access Windows 365 Cloud PC using Browser
The easiest way to access a remote Cloud PC is from Windows 365 homepage using a browser:
- Launch the Edge browser or any supported browser on your PC.
- Navigate to https://windows365.microsoft.com to access Cloud PCs.
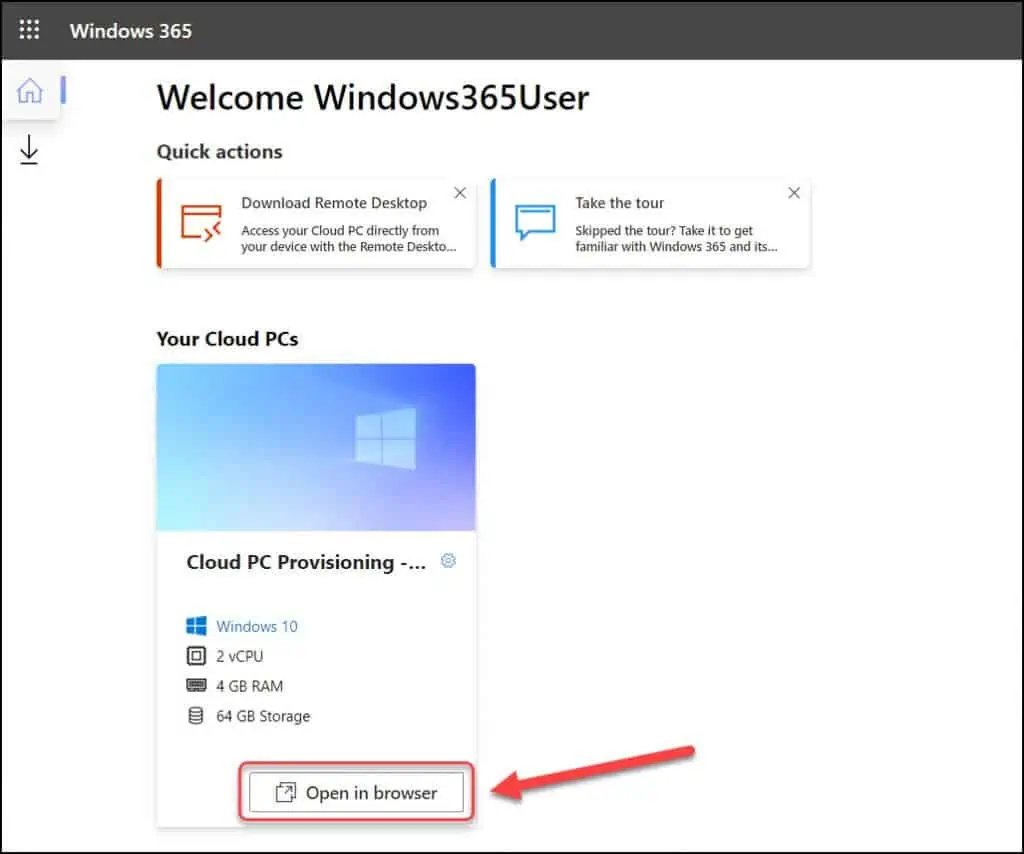
- On their Windows 365 home page, users see the Cloud PCs they have access to in Your Cloud PCs section.
- Users can select Open in browser to open their Cloud PC.
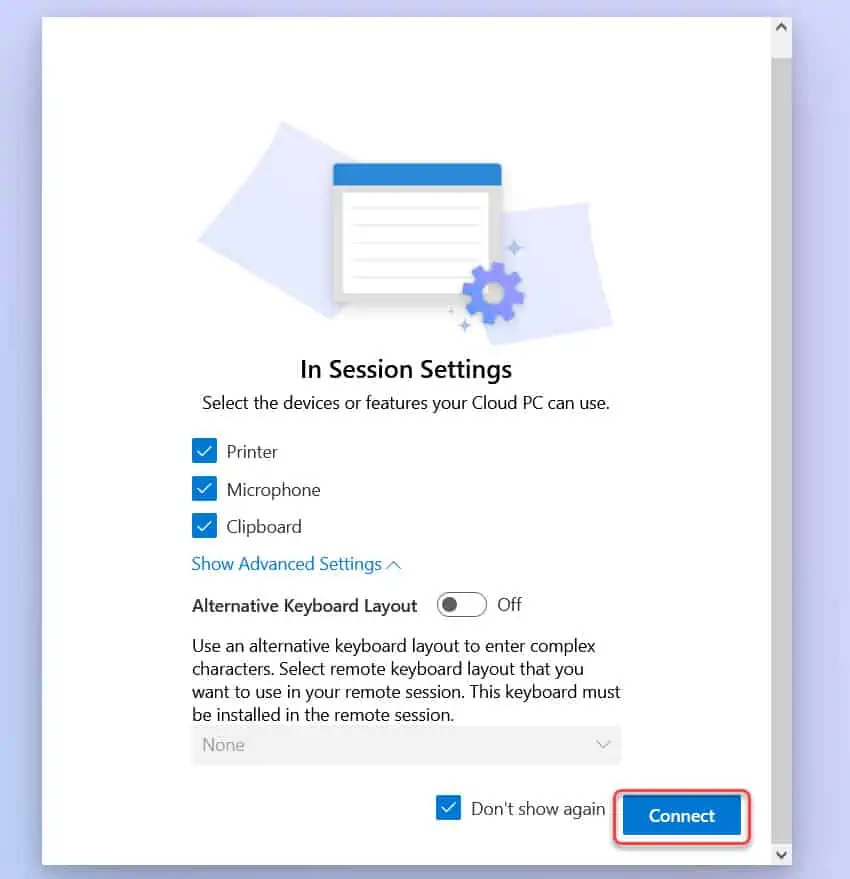
You should now see In Session Settings options where you can select the devices or features your Cloud PC can use.
- Printer
- Microphone
- Clipboard
User while accessing Cloud PC get the option to select Advanced Keyboard layout.
To access the Cloud PC, click Connect.
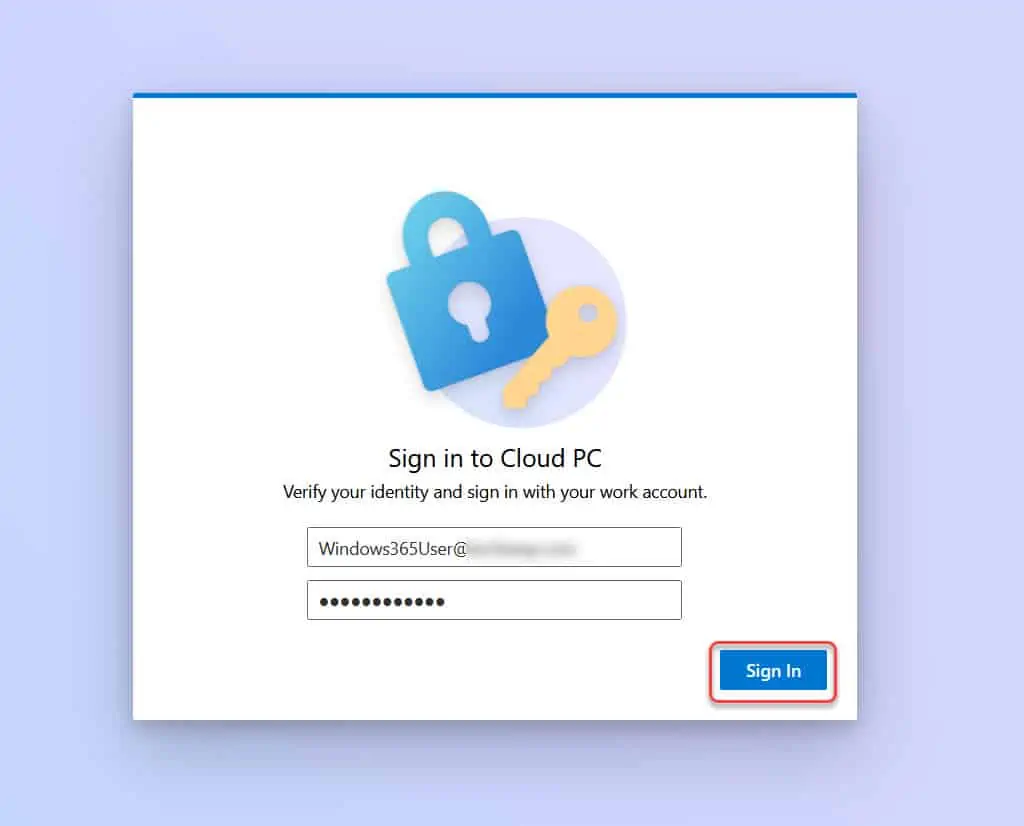
You must sign in to Cloud PC with your work credentials before you can access it. Enter the work account and click Sign In.
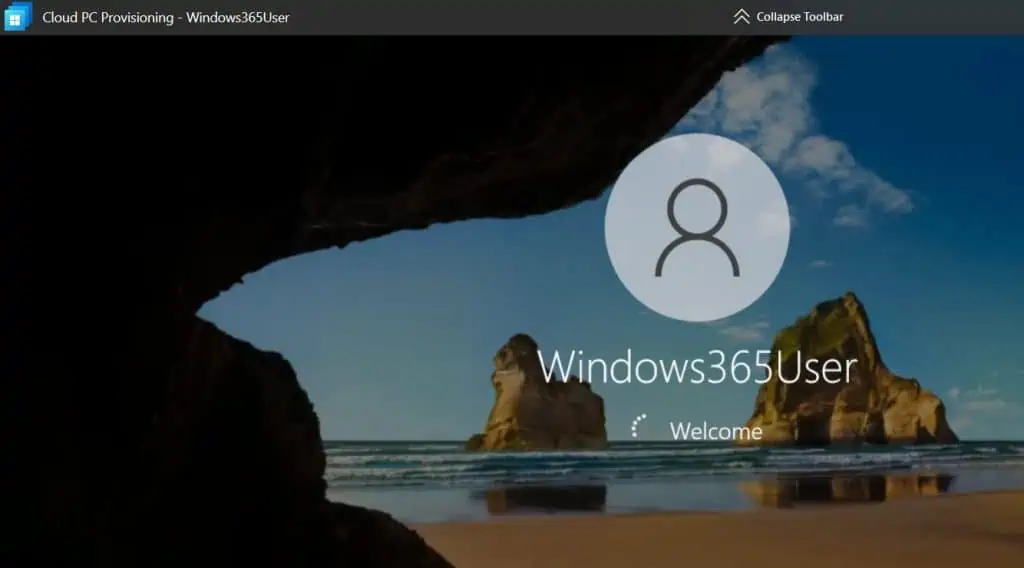
The below screenshot shows the login screen for Windows 365 Cloud PC.
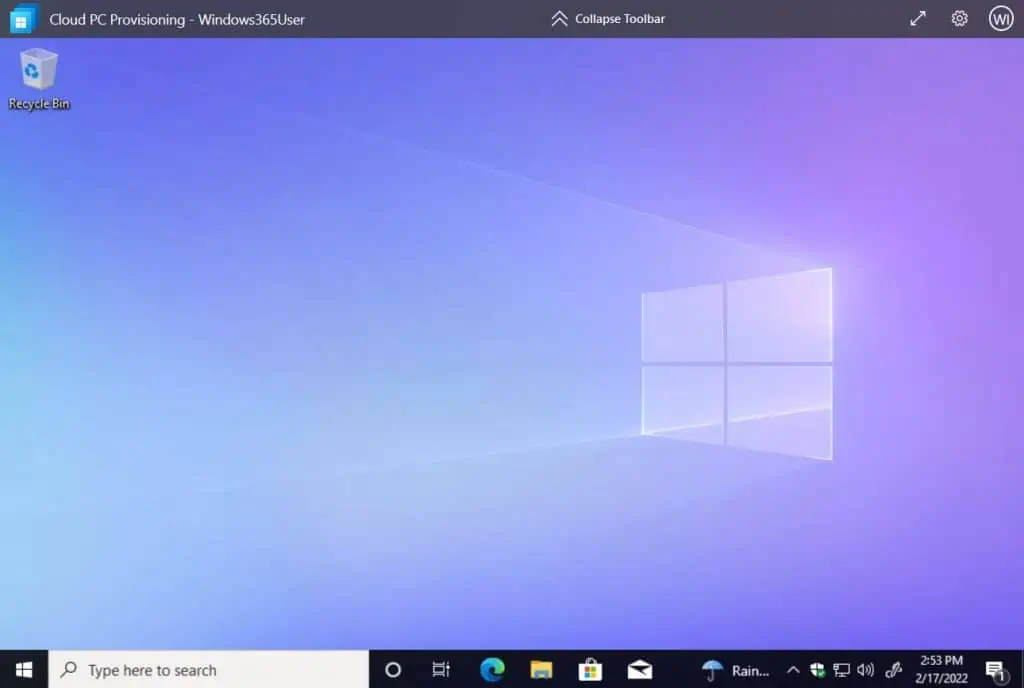
Now you have access to your Windows 365 Cloud PC. This completes the steps to access the Cloud PC from a browser using the Windows 365 home page.
To access the Windows 365 Cloud PC from Windows 365 web site, the user’s device must meet the following requirements:
- Supported operating systems: Windows, macOS, ChromeOS, Linux
- A modern browser like Microsoft Edge, Google Chrome, Safari, or Mozilla Firefox (v55.0 and later).
Method 3: Access Windows 365 Cloud PC using Microsoft Remote Desktop client
Another way to access Windows 365 Cloud PC is by using Remote Desktop Client. This method should be used if you prefer not to use a browser to access your Cloud PCs.
The Microsoft Remote Desktop app lets users access and control a remote PC, including a Cloud PC. Windows 365 users can download and install the Remote Desktop client from the Windows 365 home page.
Accessing Windows 365 Cloud PC using remote desktop client requires you to install the remote desktop client on a computer. When you have multiple Cloud PC users, you can deploy the client using Configuration Manager.
You can refer to the following guide to deploy remote desktop client using SCCM.
Download Remote Desktop Client for Cloud PC
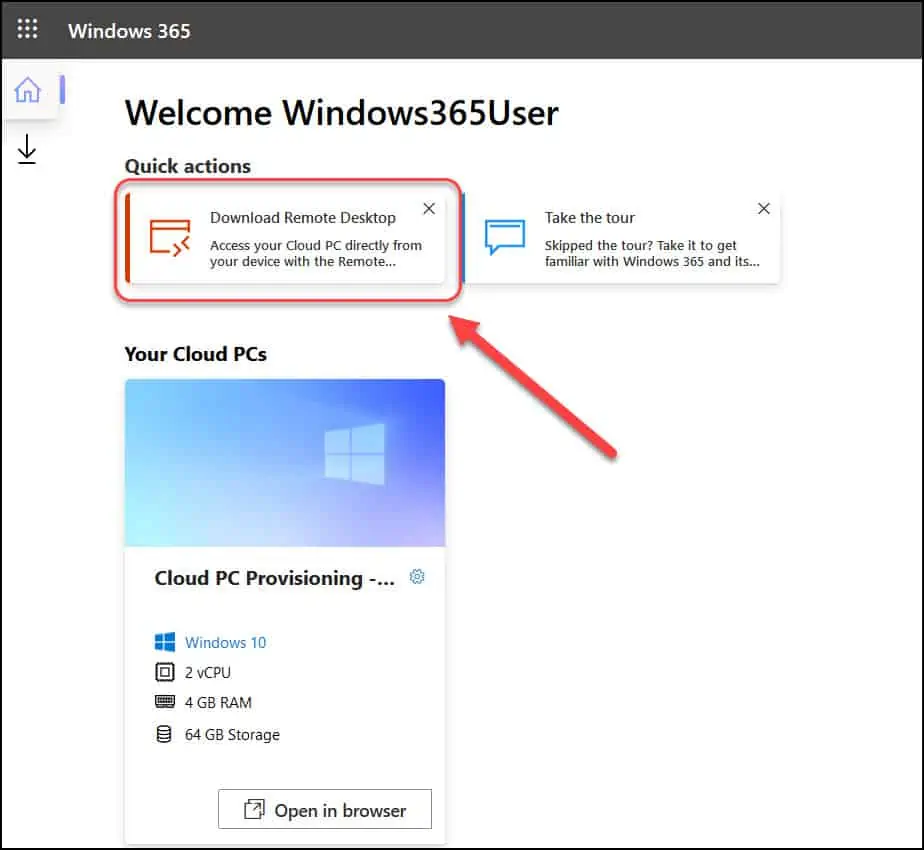
Let’s begin with downloading the remote desktop app. On the Windows 365 Home page, under Quick actions, select Download Remote Desktop.
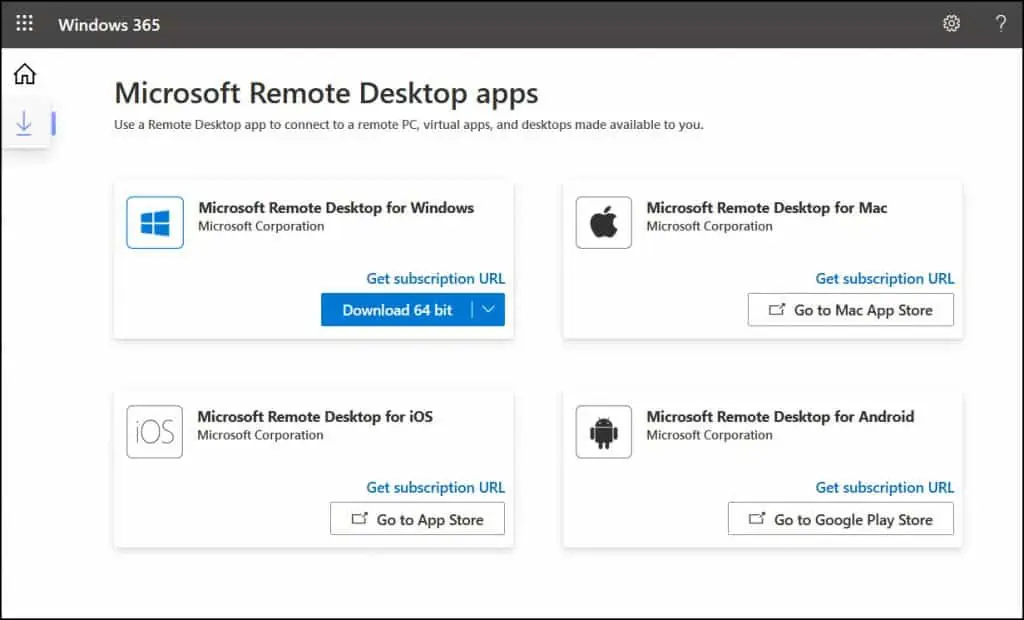
The Microsoft Remote Desktop apps are available for Windows, Mac, iOS and Android. Let’s download the Remote Desktop for Windows. On Microsoft Remote Desktop for Windows box, click Download 64-bit and save the Remote Desktop client installer.
Installing Remote Desktop for Cloud PC
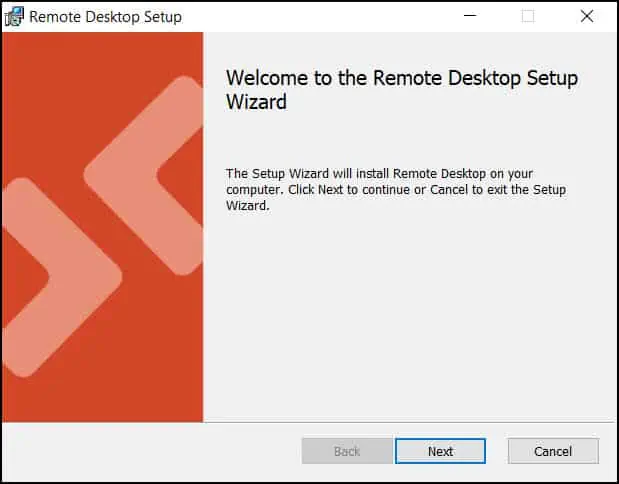
The below steps help you to install remote desktop client to access Cloud PC from your computer. Run the Remote Desktop Client installer and on the welcome screen, click Next.
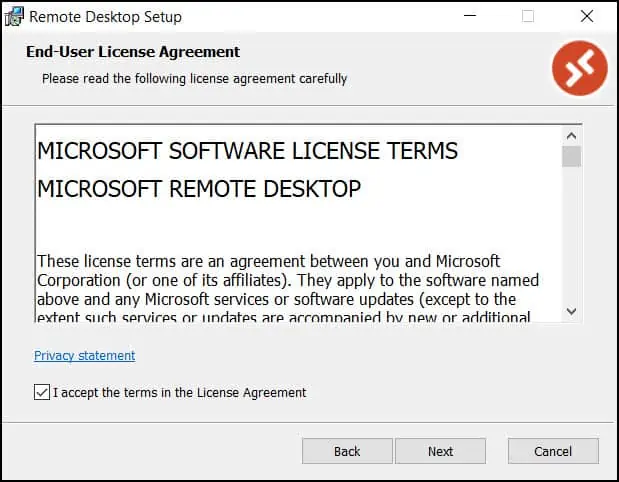
Select I accept the terms in the License Agreement and click Next.
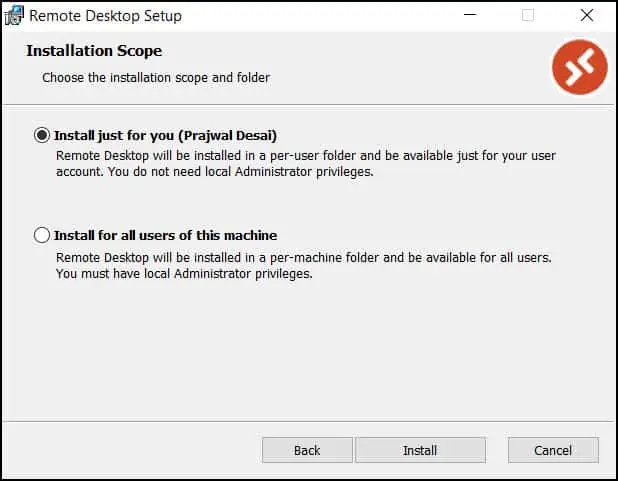
Choose the installation scope which determines whether you want to install the application for yourself or all users on the machine. Click Next.
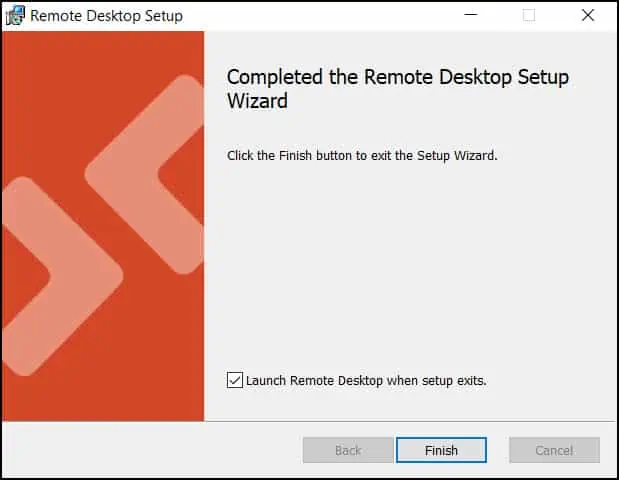
The Remote Desktop setup is complete. Close the setup wizard.
Launch the Remote Desktop and Access Cloud PC
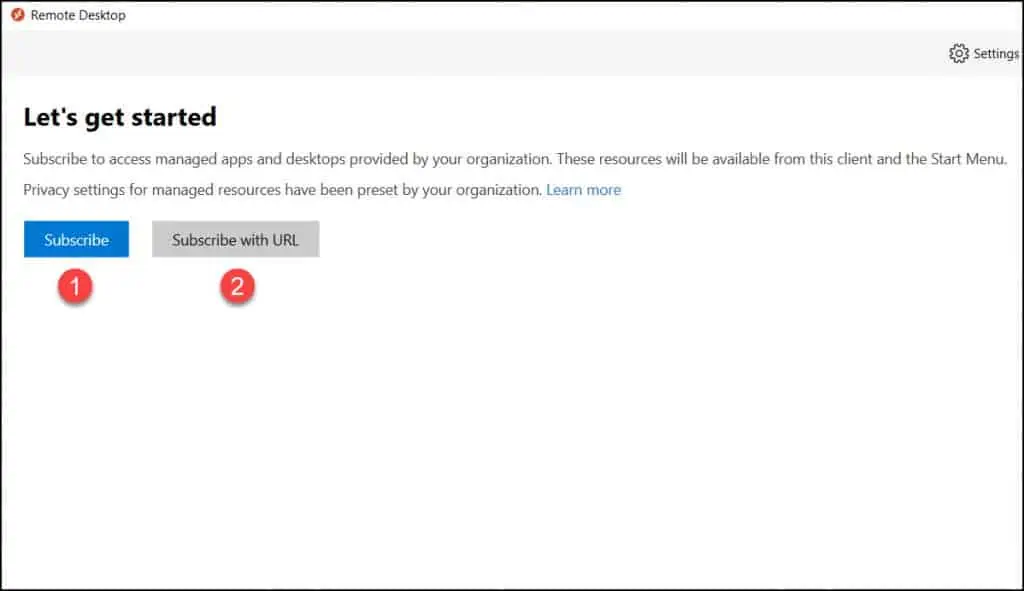
Upon launching the Microsoft Remote Desktop, you see Let’s get started window. Here there are two options presented before you can access Windows 365 Cloud PC.
- Subscribe – This is the recommended option where you can access the cloud PC with its name.
- Subscribe with URL – You can access the Cloud PC with a unique URL.
In the below example, we are going to select Subscribe to access the Cloud PC.
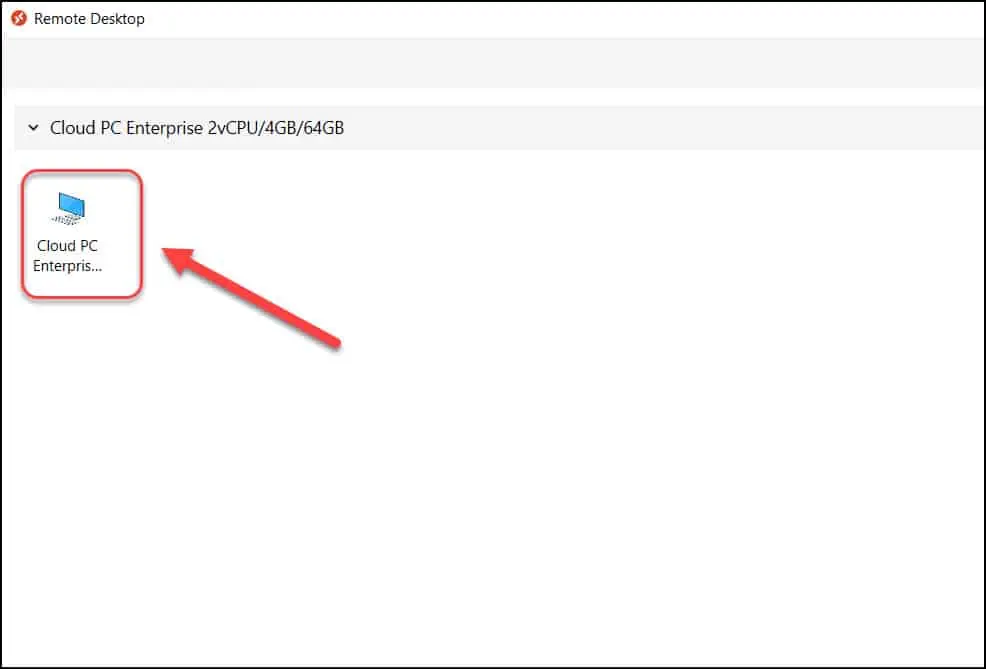
You should now see the Cloud PC provisioned for the logged-in user account. Double-click the Cloud PC entry.
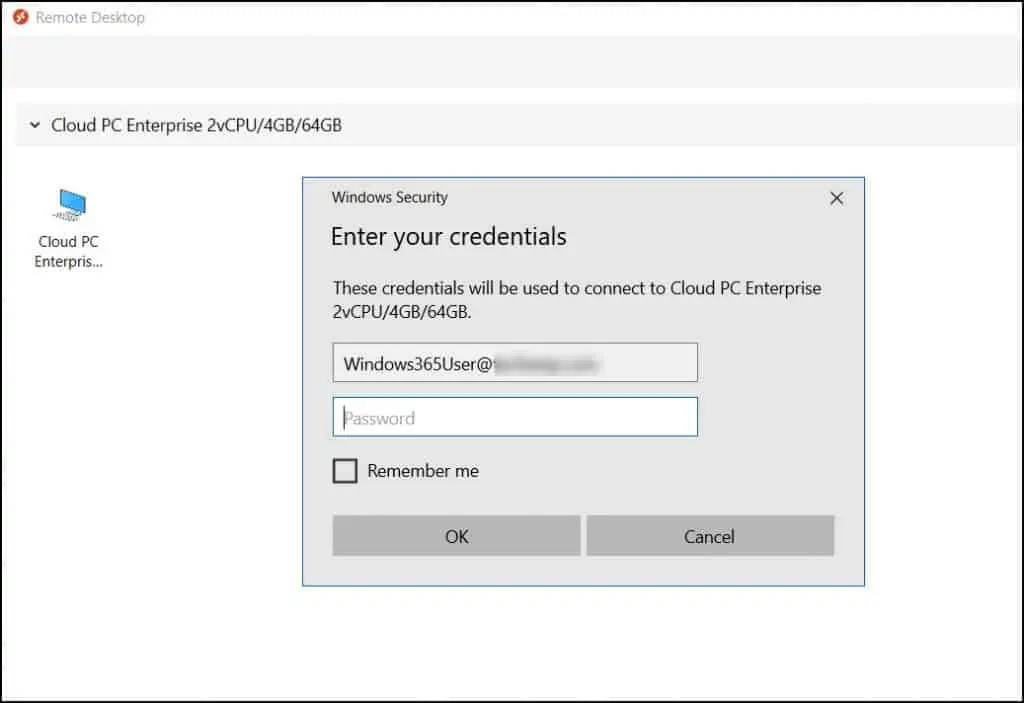
To access the Windows 365 Cloud PC, sign in with your work account and click OK.
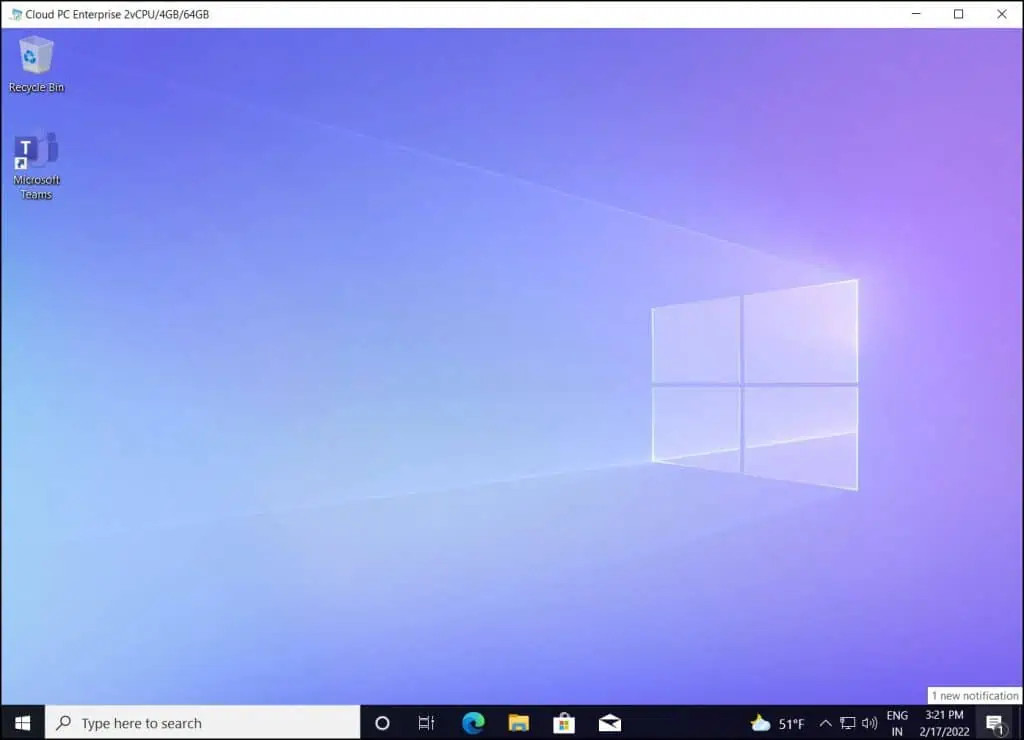
Using the remote desktop client, you can easily access Windows 365 Cloud PC. The below screenshot shows the Cloud PC being accessed via Remote Desktop client. The experience is very similar to that of accessing your personal PC.
Wrapping up
I hope you now know the different methods that you can use to get connected to your Windows 365 Cloud PC. All the three methods described in this article explain to you how to access a Cloud PC remotely. The Remote Desktop App provides more options for your display compared to the browser session. Whereas the Windows 365 App is a new and modern approach to connect to a cloud PC. What is your favorite way to access the Cloud PCs?
