Deploy Remote Desktop Client using SCCM | ConfigMgr
In this post I will show you how to deploy Remote Desktop Client using SCCM (ConfigMgr). We will download the latest version of Remote Desktop Client, package it in SCCM and deploy it to users.
You can use the Remote Desktop client for Windows Desktop to access Windows apps and desktops remotely from a different Windows device.
Using ConfigMgr, you can deploy Remote Desktop clients to all users with Azure Virtual Desktop access.
Table of Contents
Download Remote Desktop Client
First, download the Remote Desktop client for Windows from the Microsoft site. The downloads are available for 64-bit, 32-bit operating systems. Download both of them if you have a mix of 32-bit and 64-bit OS.
I will be downloading 64-bit Remote Desktop Client for SCCM.
Save the RD client installer to sources folder or shared folder, which will act as content source while packaging the application in SCCM.
Additionally, if you want to specify an icon to Remote Desktop Client in software center, download the icon and place it in a folder along with RD client.
Create Remote Desktop Client Application in SCCM
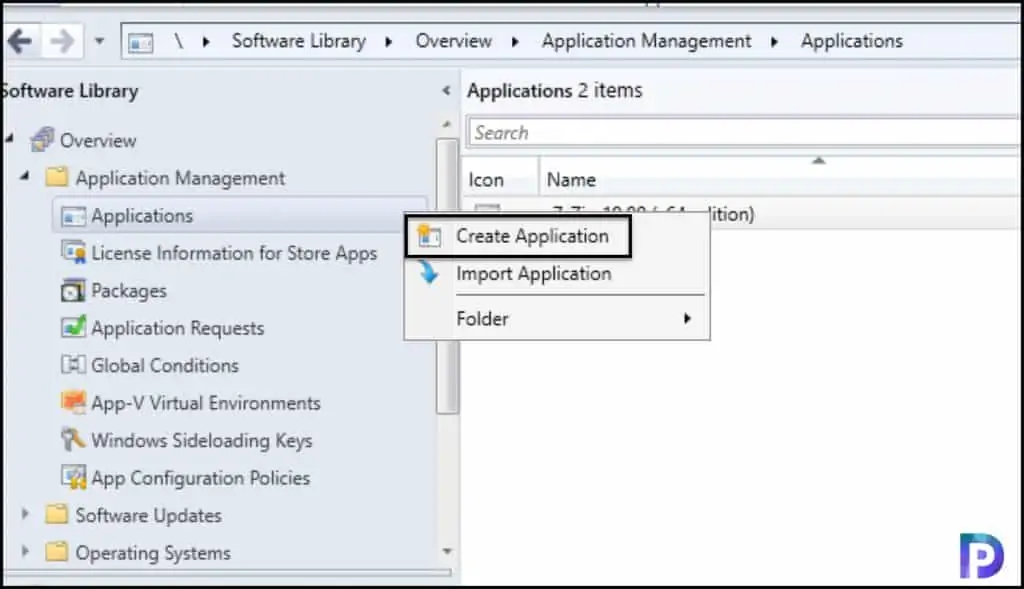
Let’s create a new application for Remote Desktop Client in SCCM. Launch the Configuration Manager console and go to Software Library\Overview\Application Management\Applications. Right click Applications and click Create Application.
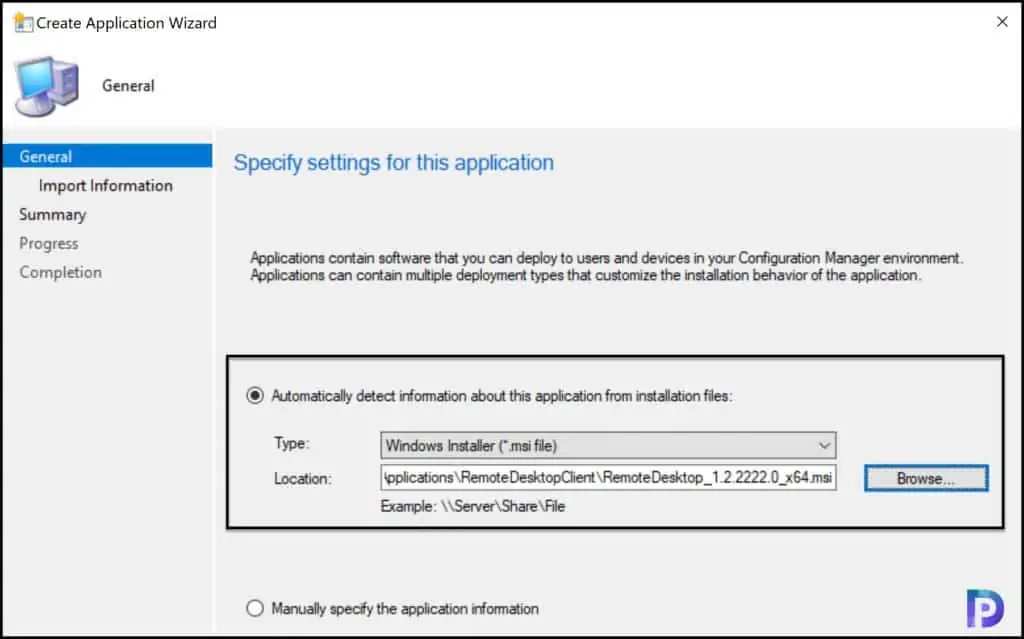
Select Automatically detect information about this application from installation files. Choose the Type as MSI installer and specify the location of Remote Desktop Client MSI setup file. Click Next.
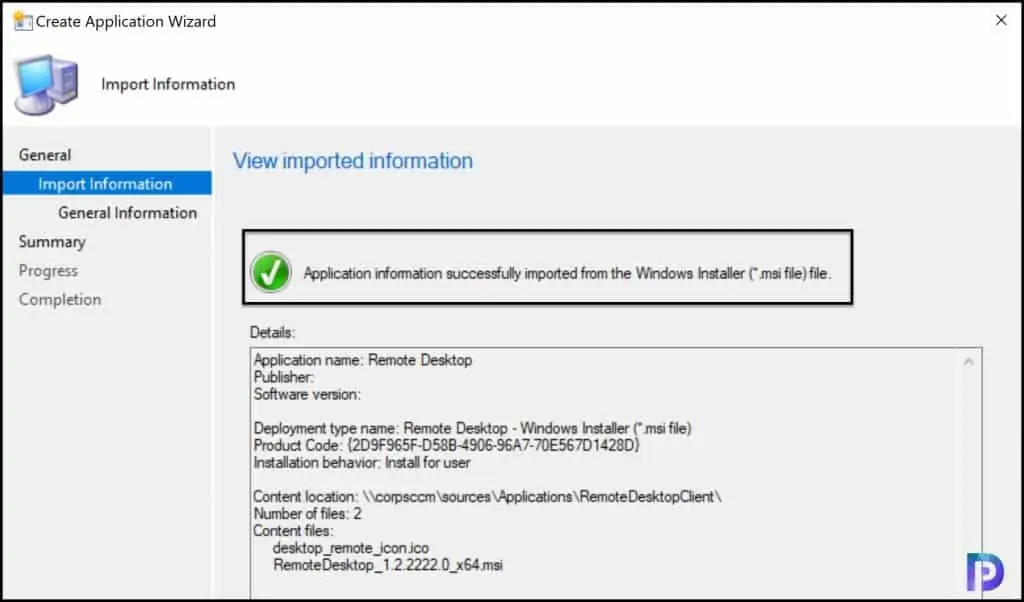
The application information is successfully imported from the Remote Desktop Client Windows Installer file. Click Next.
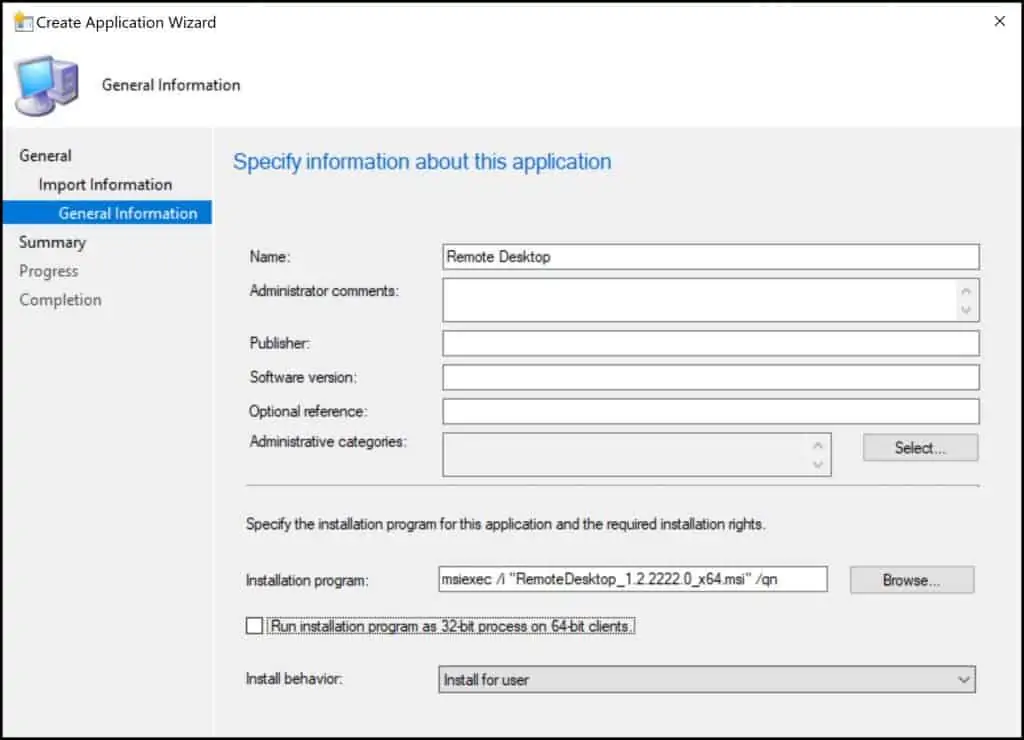
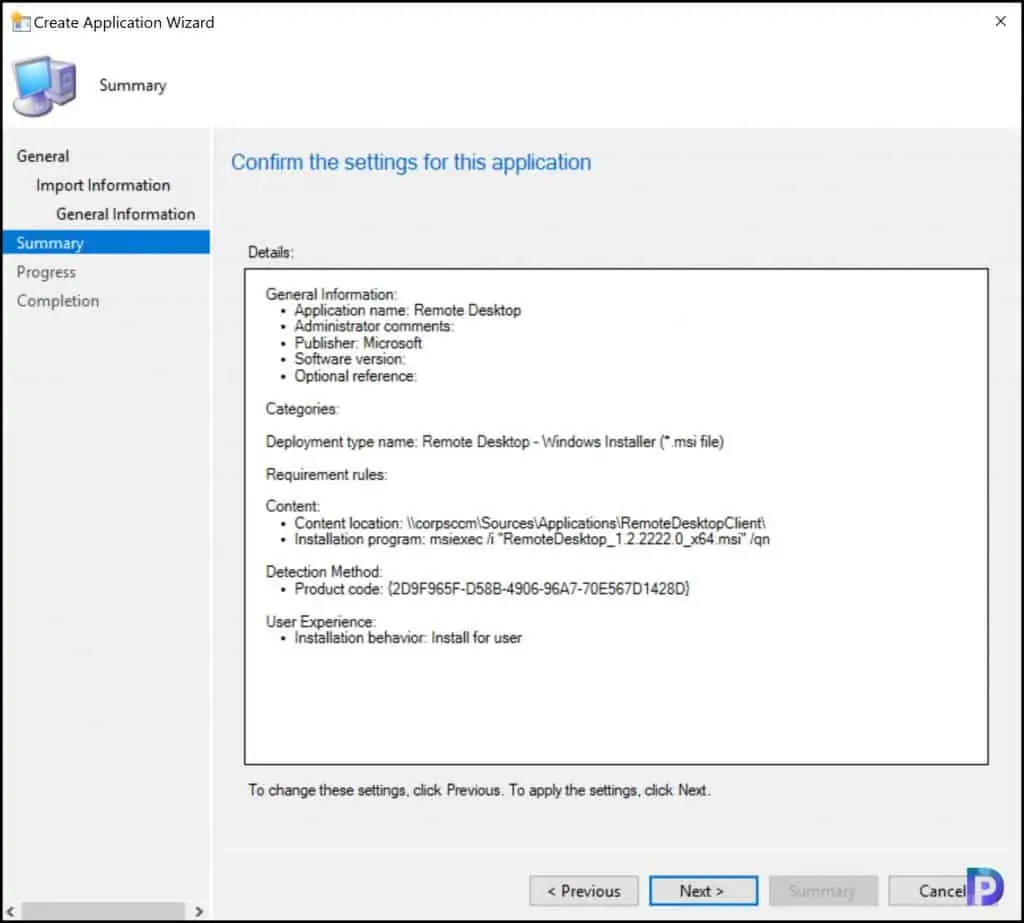
On the General Information window, you can specify application information such as Publisher, Software Version etc. The installation program is populated from the RDC .msi installer file. The install behavior is set to install for user. Click Next.
Important – When you specify the path of Remote Desktop Client .msi installer, it picks the install command as msiexec /i "RemoteDesktop_1.2.2222.0_x64.msi". This command will not silently install the application and will require manual input to install the remote desktop client. To fix this you need to append /qn at the end of the command to deploy it silently and without requiring any user input.
Click Next on the Summary window and on the Completion window click Close. This completes Remote Desktop Client application creation in SCCM.
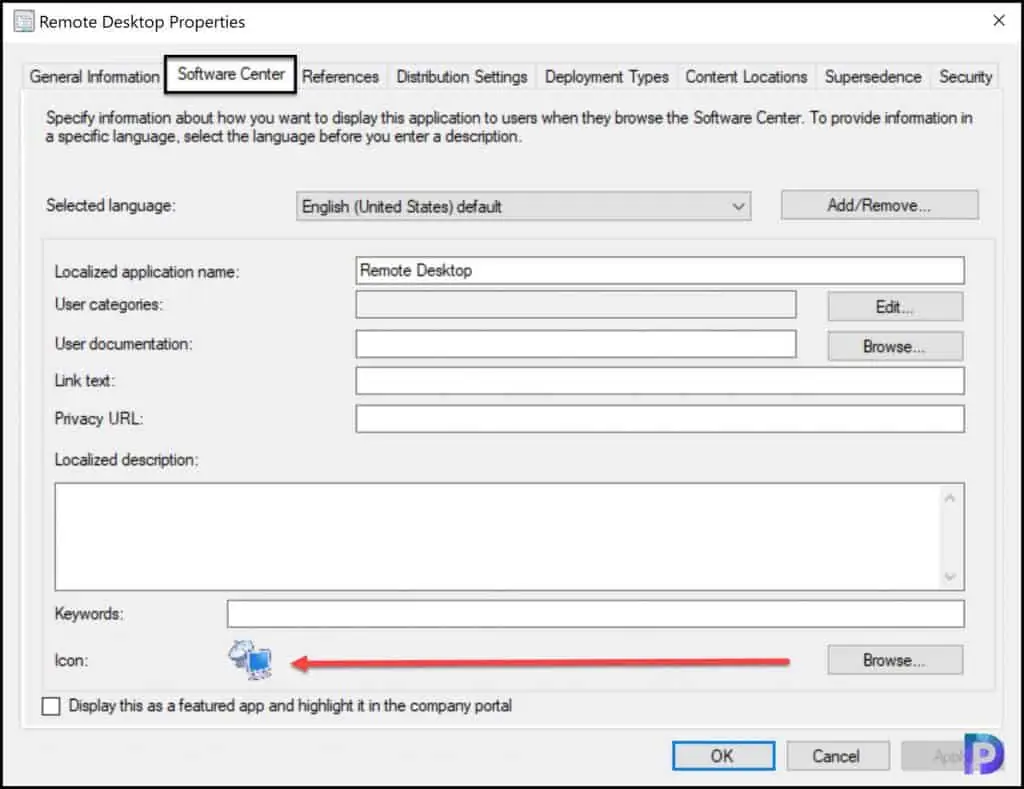
After the RDC application is created, you may specify the icon for this application. This is an optional step, but if you usually specify the icons for applications, you can do so for this application. The icon that you specify here will appear along with application name in Software Center.
Right click Remote Desktop Client application and click Properties. Select the Software Center tab and at the bottom, click Browse and specify the icon for Remote Desktop Client. Click Apply and OK.
Deploy Remote Desktop Client using SCCM
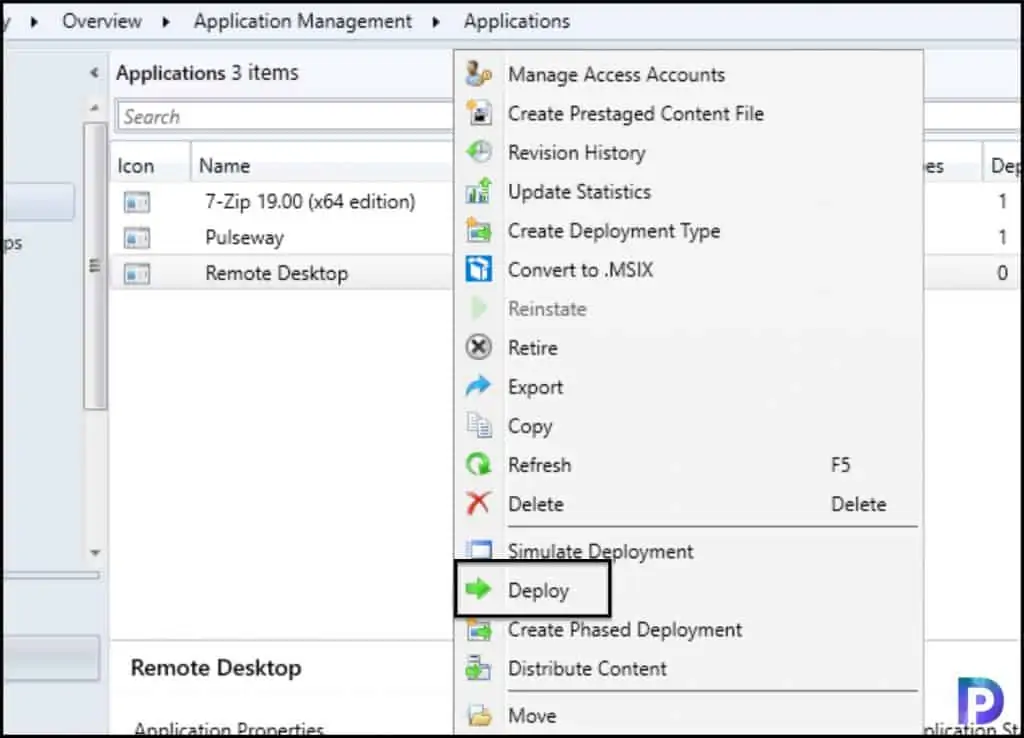
Let’s look at the steps to deploy Remote Desktop Client using SCCM. Right click Remote Desktop Client application and click Deploy.
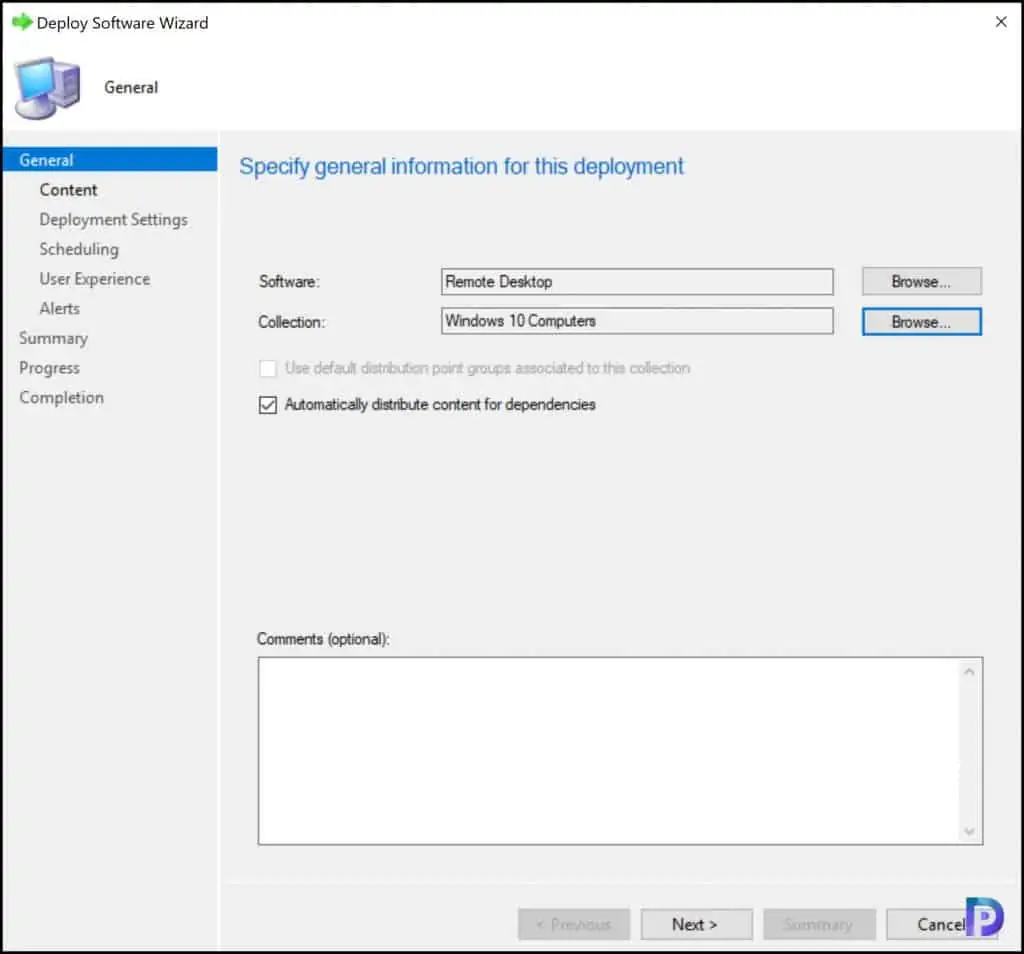
On the General window, click Browse and choose the user collection to which you want to target the Remote Desktop Client application. Click Next.
You can install the client for the current user, which doesn’t require admin rights, or your admin can install and configure the client so that all users on the device can access it.
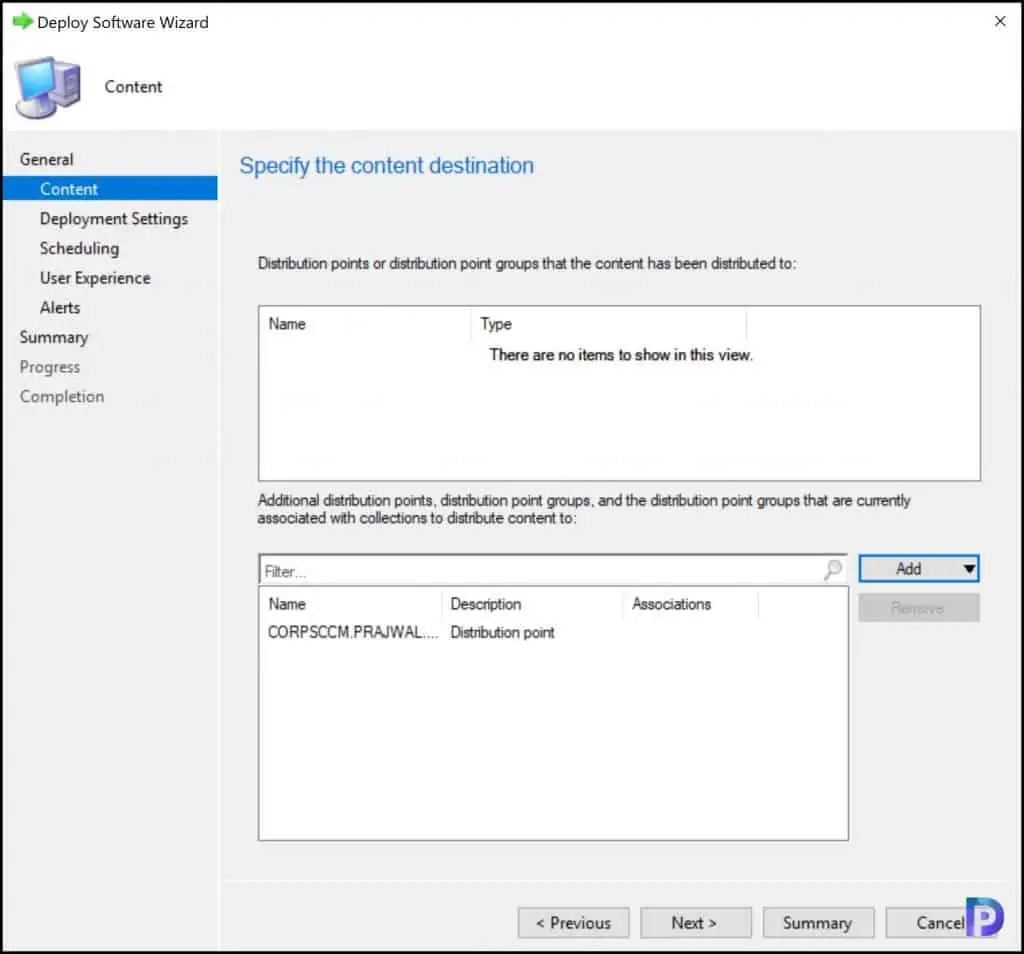
You must ensure the content is distributed to all the distribution points. This is the location from where the clients will download the Remote Desktop Client for installation. Click Add button and select the SCCM distribution points.
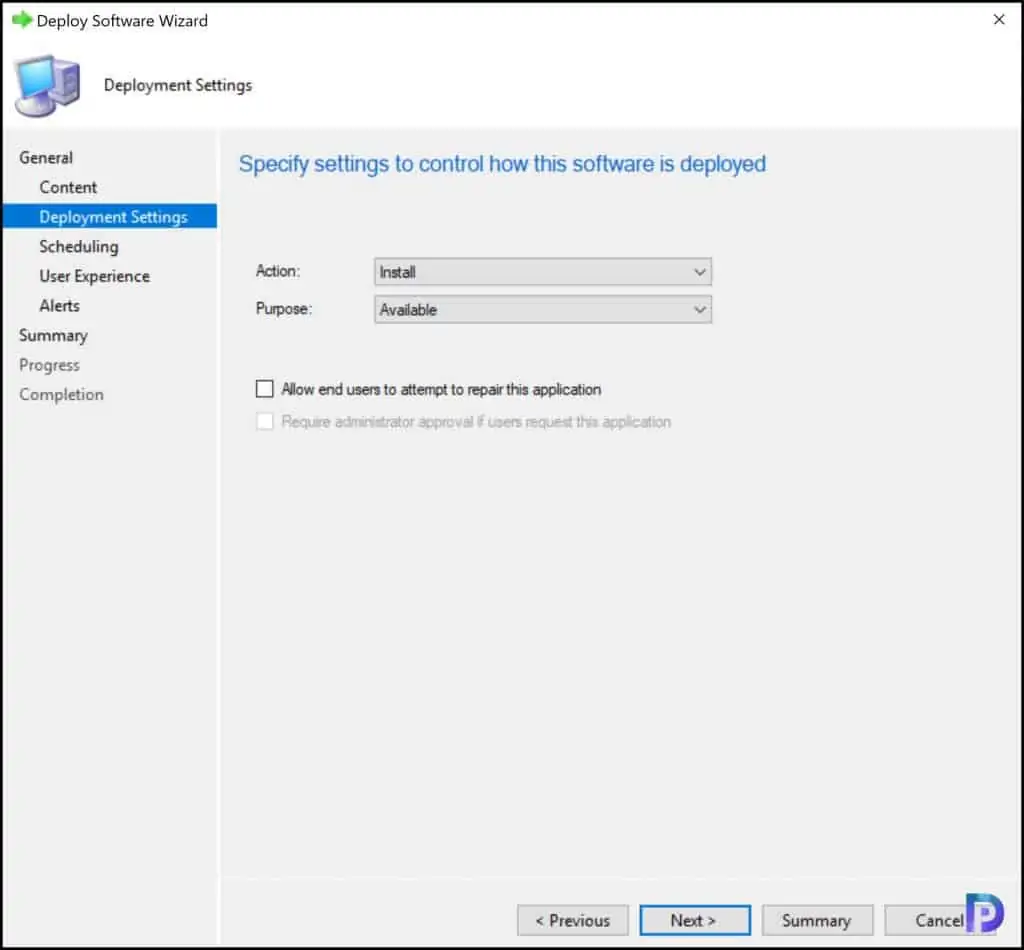
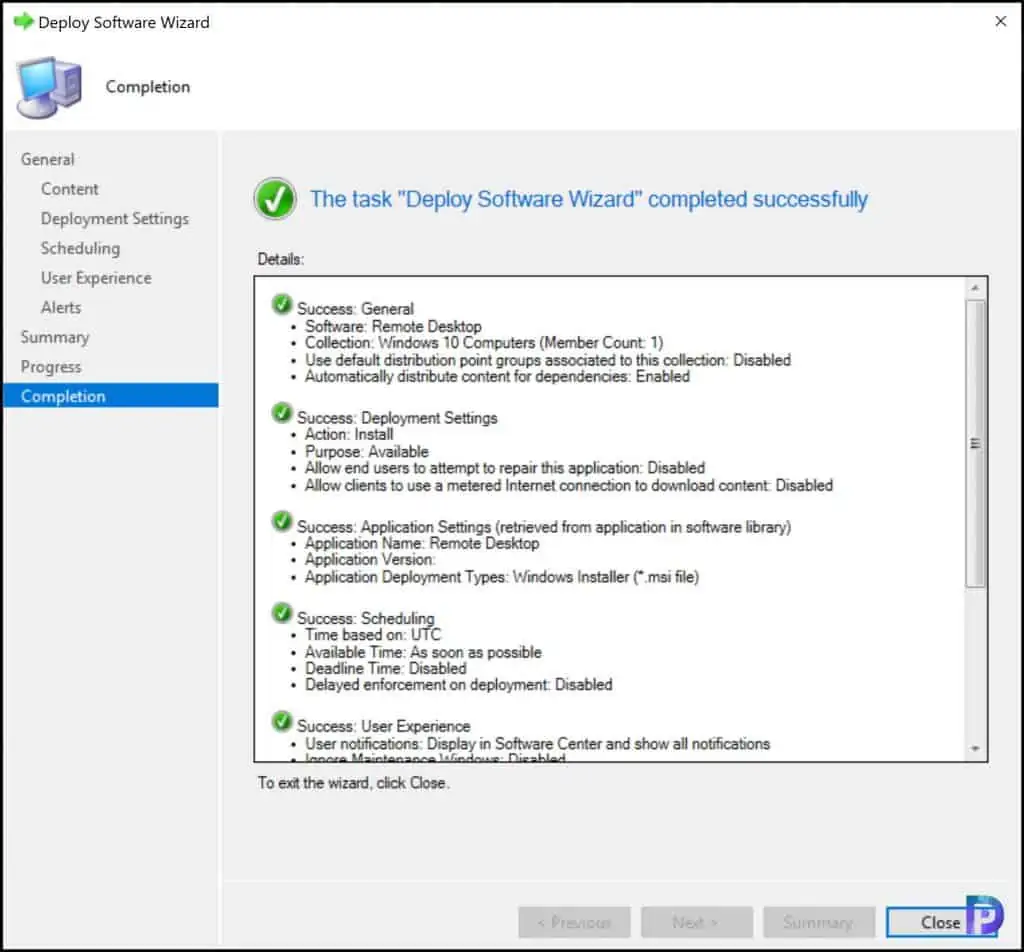
On the Deployment Settings window, select the Action as Install and Purpose as Available. Click Next.
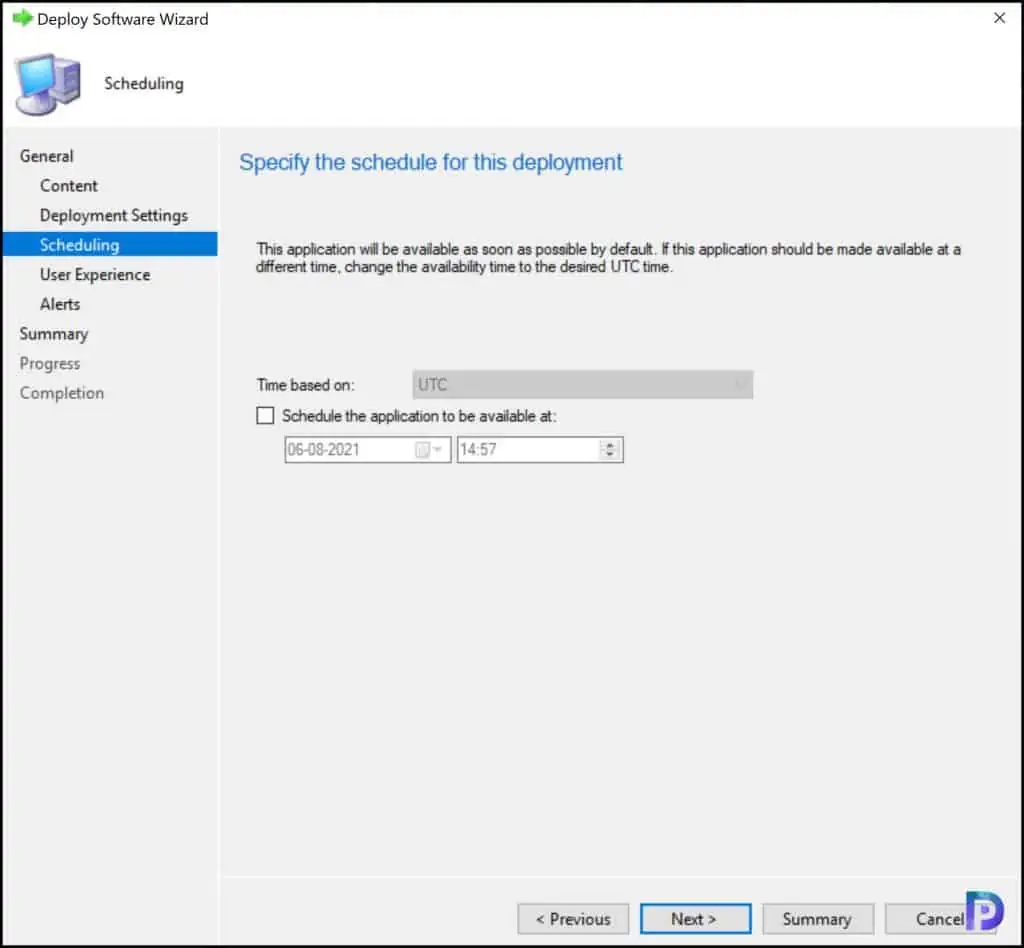
You may schedule the deployment by choosing a specific date and time. I am going to skip that here. Click Next.
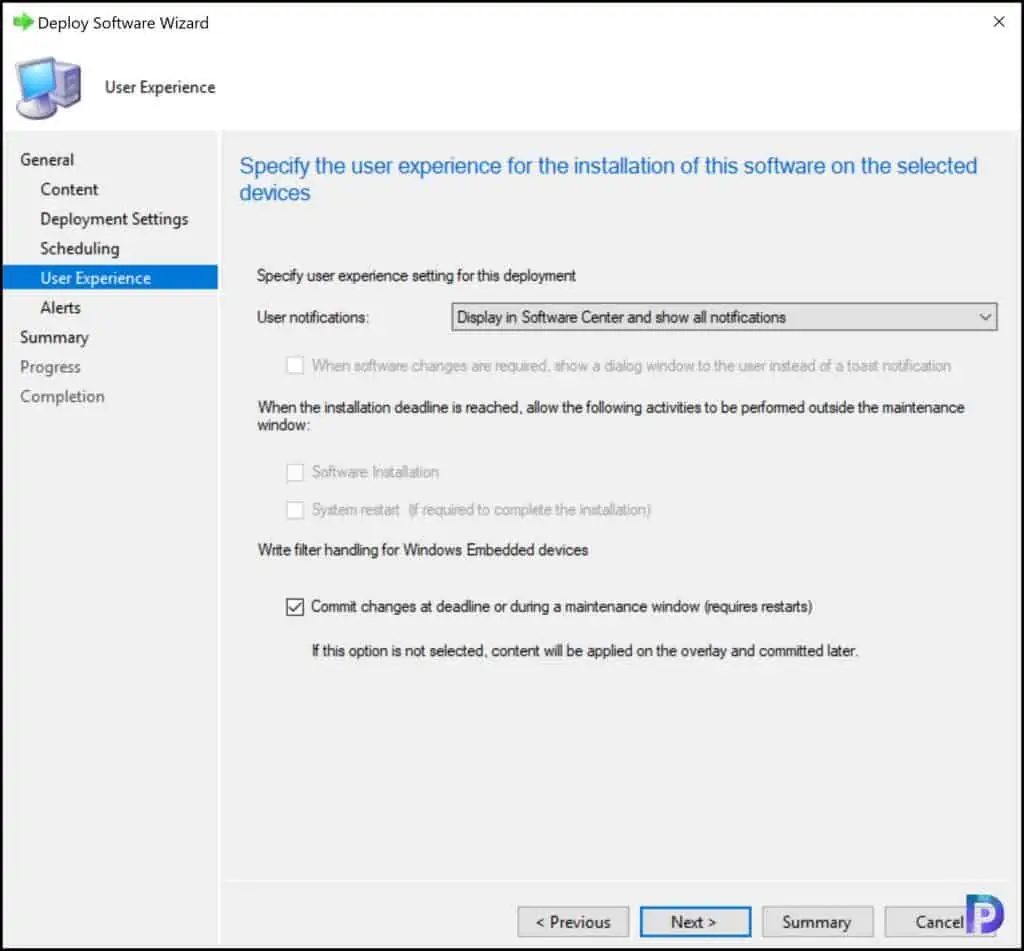
Specify the User Experience settings and click Next.
On the Alerts and Summary window, click Next. On the Completion window, click Close. We have successfully deployed the Remote Desktop Client application to our users.
Test Remote Desktop Client Application Installation
Let’s test the Remote Desktop Client application installation on a few machines. Login to one of the computers with a user account that has been deployed with RDC application.
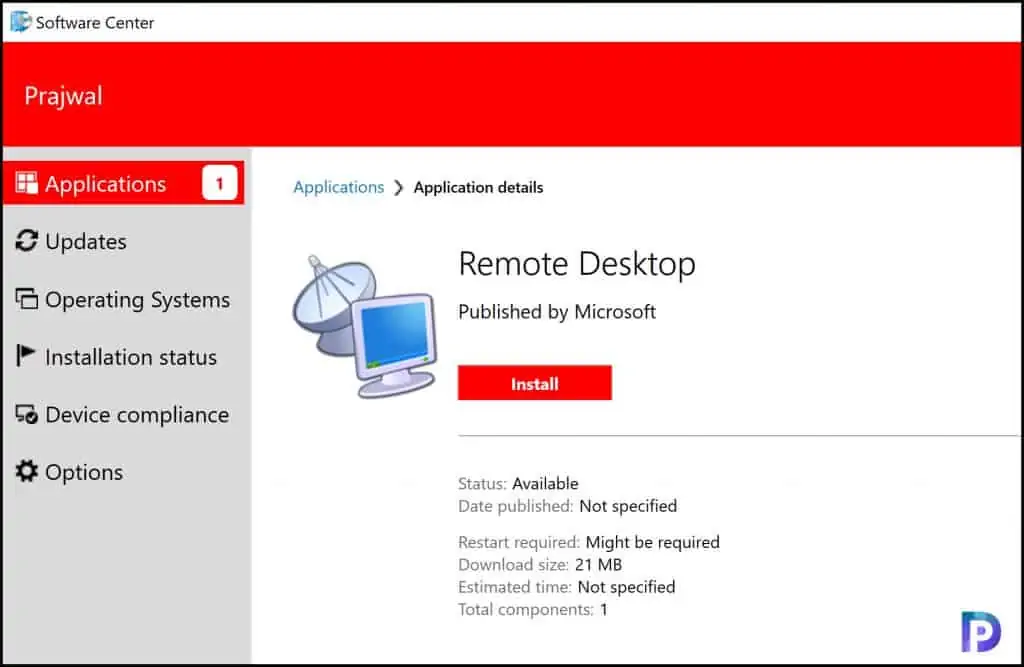
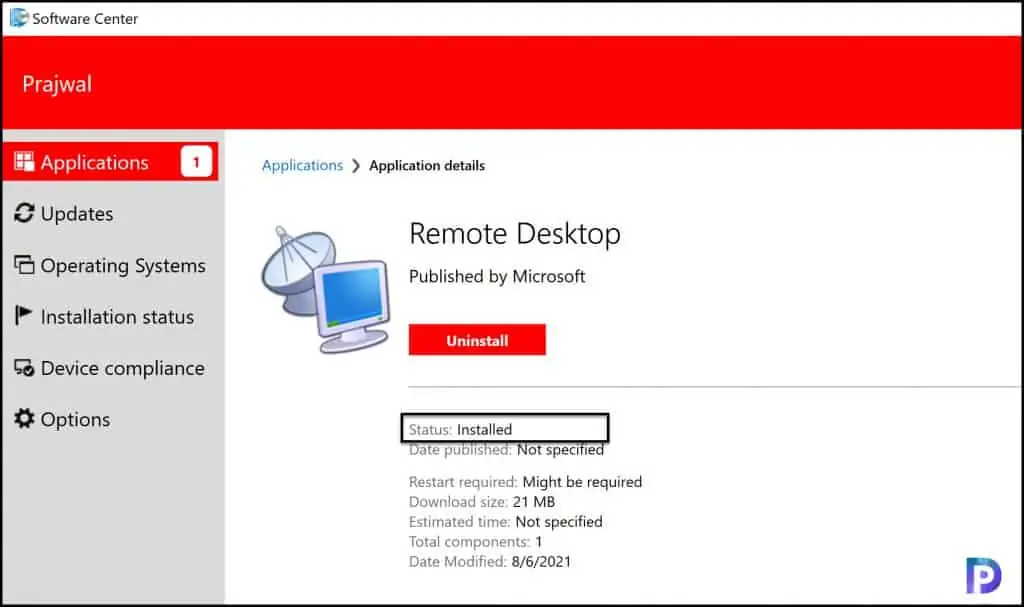
Launch the Software Center and select the Applications tab. Click Remote Desktop Client application and then click Install. The client now downloads the software from the local distribution point and the remote desktop client is installed.
You can monitor the application installation progress by opening the AppEnforce.log file located on the client computer.
Prepared working directory: C:\Windows\ccmcache\5
Found executable file msiexec with complete path C:\Windows\system32\msiexec.exe
Prepared command line: "C:\Windows\system32\msiexec.exe" /i "RemoteDesktop_1.2.2222.0_x64.msi" /qn
Valid MSI Package path = C:\Windows\ccmcache\5\RemoteDesktop_1.2.2222.0_x64.msi
Advertising MSI package [C:\Windows\ccmcache\5\RemoteDesktop_1.2.2222.0_x64.msi] to the logged on user.
Executing Command line: "C:\Windows\system32\msiexec.exe" /i "RemoteDesktop_1.2.2222.0_x64.msi" /qn with user context
Working directory C:\Windows\ccmcache\5 AppEnforce
Post install behavior is BasedOnExitCode
Waiting for process 1004 to finish. Timeout = 120 minutes.
Process 1004 terminated with exitcode: 0
Looking for exit code 0 in exit codes table…
Matched exit code 0 to a Success entry in exit codes table.
Performing detection of app deployment type Remote Desktop - Windows Installer (*.msi file)(ScopeId_187120FE-9A9C-46D3-9808-A9944585A41E/DeploymentType_a7192215-2158-483b-8677-a92bea6c299a, revision 3) for user.
From the log file, we see, Matched exit code 0 to a Success entry in exit codes table which confirms that the application is installed successfully. I hope this post makes it easier to deploy Remote Desktop Client using SCCM (ConfigMgr).
