How To End Grace Period for Cloud PCs in Windows 365
If you want to end grace period for Cloud PCs, you can do that with few easy steps in Windows 365. Let’s understand what is a Grace Period for Cloud PCs and what happens when you end the grace period for Cloud PCs.
When you provision a Cloud PC in Windows 365, a user has to have a license to access it. Only when a user has been assigned a Windows 365 license, the access to Cloud PC is granted. On the other hand, you create a provisioning policy in Windows 365 and assign it to Azure AD user groups or Microsoft 365 groups.
When you give a user a Windows 365 license and a provisioning policy to use a Cloud PC, the status of the PC changes to “provisioned.” In some circumstances, you might not want to wait the customary seven days for the grace period to expire. You can end the grace period right away in this situation by selecting the End grace period option.
What is Grace Period for Cloud PCs?
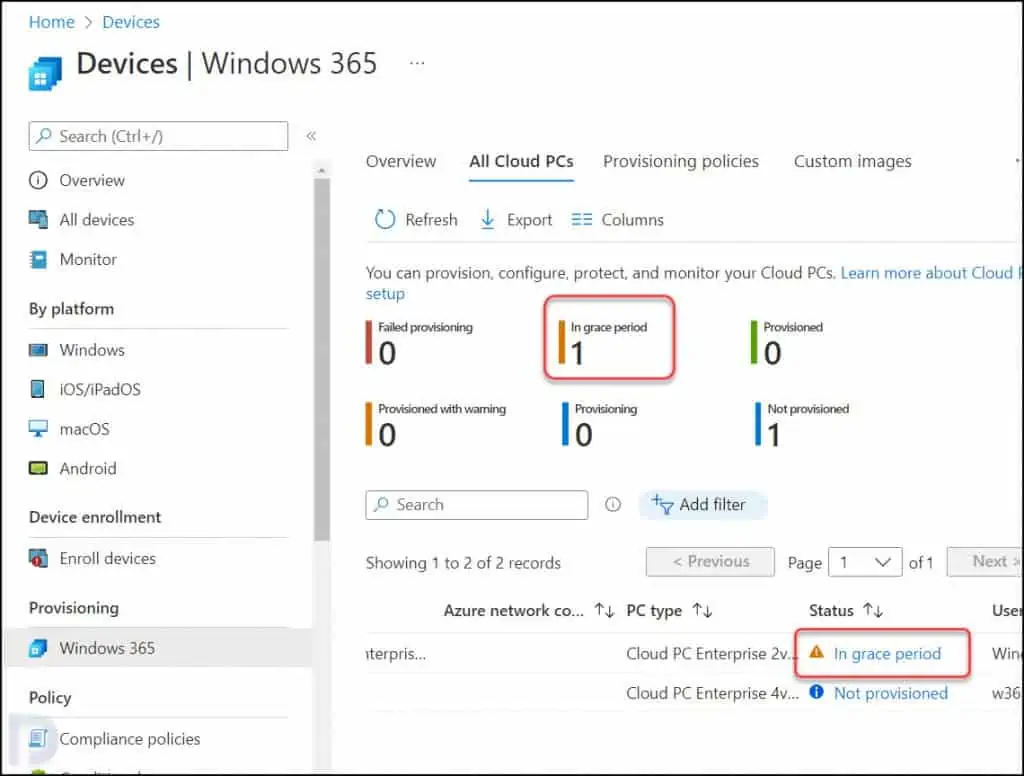
When a license/assignment change occurs for a user with a current Cloud PC, the Cloud PC object is marked as In grace period. Grace periods help admins avoid licensing/targeting mistakes that might cause users to lose access to their Cloud PC.
The grace period is triggered if the Windows 365 license is removed from the assigned user, or the provisioning policy is unassigned. For example, if you unassign a Windows 365 license for a user, the cloud PC assigned to that user will be marked as In grace period.
How to find Cloud PC In grace period status?
In the Intune portal (MEM admin center), select Devices > Windows 365 > All Cloud PCs. Under the list of devices, check the status of Cloud PC for In grace period.

When a Cloud PC is in a grace period, the user can continue using the Cloud PC for seven days. After the seven-day grace period expires, the user is logged off the Cloud PC. They’ll lose access and the Cloud PC will be deprovisioned.
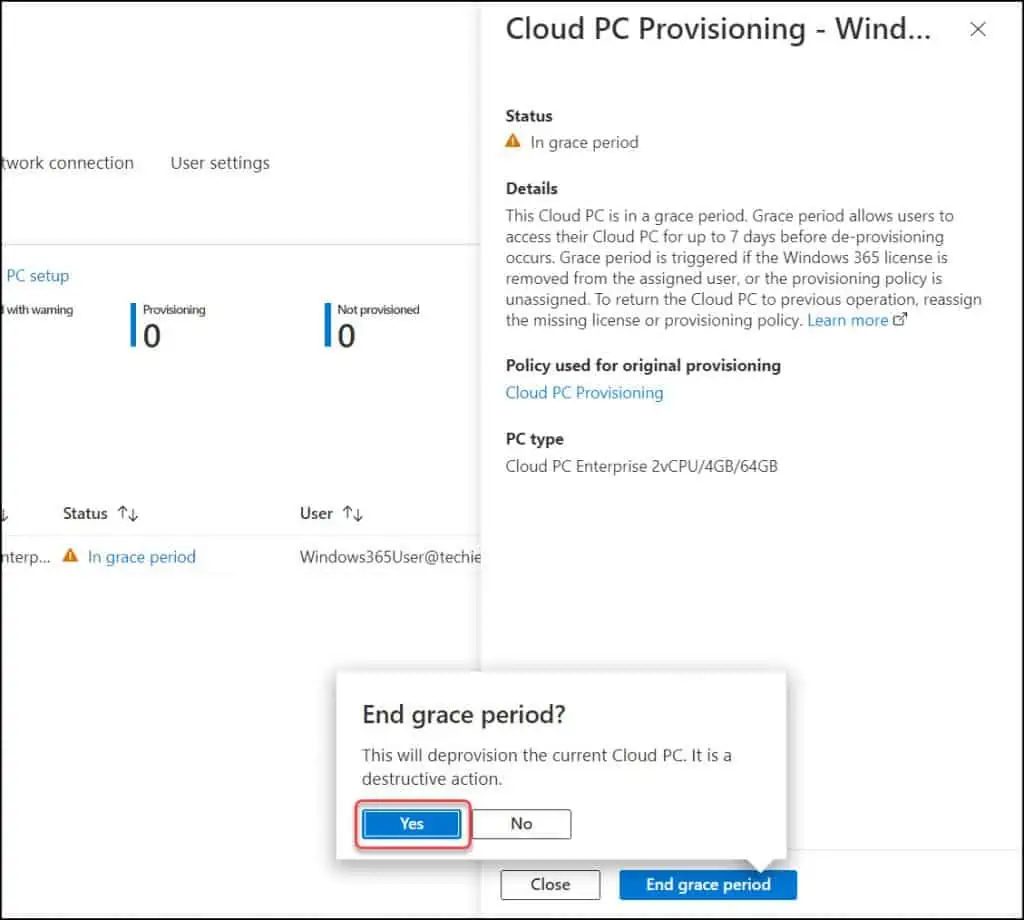
“Ending the grace period is a destructive action. Hence, you must notify the users about the Cloud PC grace period. When the grace period ends, user will lose access to Cloud PC and data stored in the Cloud PC“.
Have you noticed that there is no Delete option for Cloud PCs? That’s because Microsoft is aware that deleting a Cloud PC even mistakenly will cause many issues. Hence, Grace Period is the safe option for both admins and Cloud PC users.
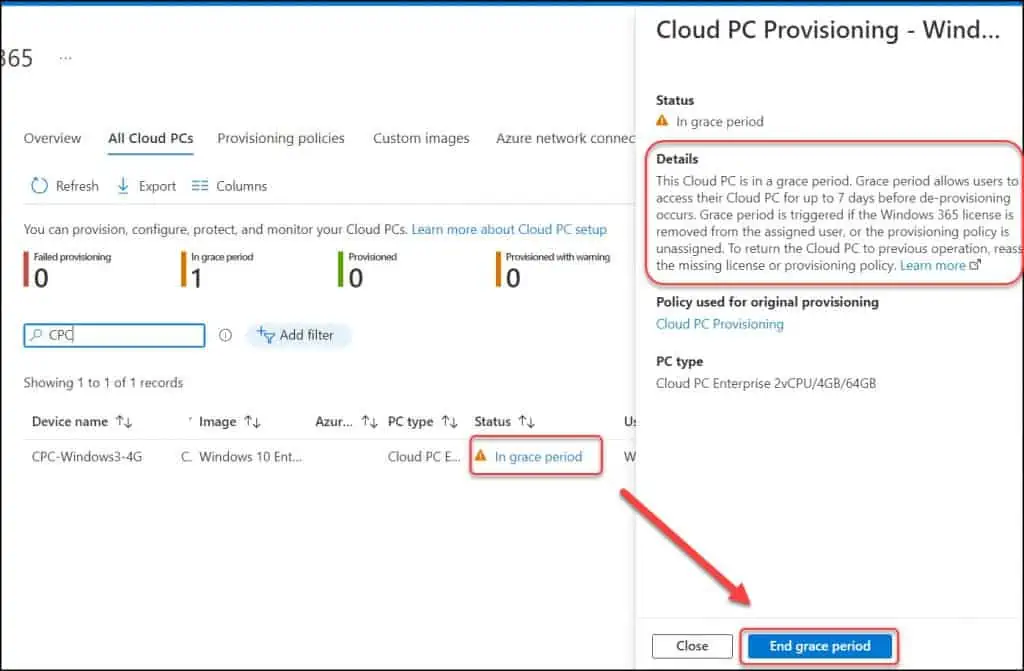
There may be situations where you don’t want to wait seven days for the grace period to end normally. In this case, you can use the End grace period option to immediately end the grace period and deprovision Cloud PC.
How to End Grace Period for Cloud PCs in Windows 365
You can perform the following steps to end grace period for Cloud PCs in Windows 365:
- Sign in to the Microsoft Endpoint Manager admin center.
- Select Devices > Windows 365 > All Cloud PCs.
- Select the Cloud PC and in the Status column of the list, select In grace period.
- To end the grace period for selected Cloud PC, click End grace period.

When you attempt to end grace period for Cloud PCs, you get a notice – End Grace Period? This will deprovision the current Cloud PC. It is a destructive option. Click Yes to continue.

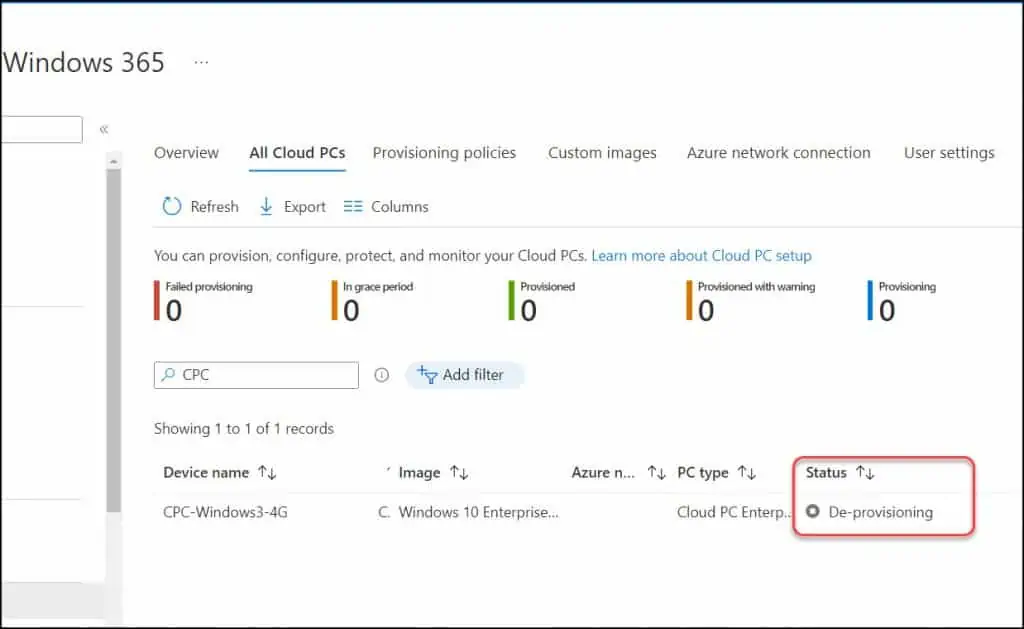
After you end grace period for a Cloud PC, the status of Cloud PC immediately changes to deprovisioning.

What happens after Cloud PC Grace Period Ends?
After you end the grace period for cloud PCs in Windows 365, the following steps will happen automatically:
- The Cloud PC will start deprovisioning. You will find the status of Cloud PC as deprovisioning.
- The user loses access to the Cloud PC.
- The operating system and data are deleted from the Cloud PC. The Cloud PC is no longer available.
- If the original provisioning policy was replaced with a different policy, the Cloud PC will be reprovisioned with the settings in the new policy.
