Enable .NET Framework 3.5 in Windows 10 using SCCM
In this post we will see the steps to enable Dot Net Framework 3.5 in windows 10 using SCCM. Few legacy applications still need dot net framework 3.5 to function well.
When you install windows 10, the .Net Framework 3.5 is not enabled. The user has to enable it manually and this is painful when you have many systems in your setup.
We will be using SCCM to achieve this task. We will create a package that enables .Net framework 3.5 in Windows 10. To enable dot net framework 3.5, there are various methods to go with.
You could also use DISM method or group policy or by using Powershell too. We will use a very simple way to deploy the dot net framework 3.5.
Related Posts :-
- List SCCM Application Deployments Using PowerShell Script
- Get Configuration Manager Client Cache Size using PowerShell
- Install Azure PowerShell Module in Windows 10
Enable NET Framework 3.5 in Windows 10 using SCCM
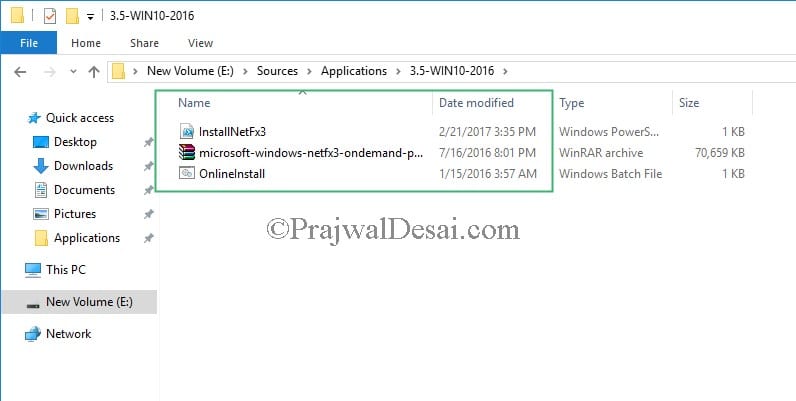
Let’s now look at the steps to enable .NET framework 3.5 in windows 10 using SCCM. First of all I have got few set of files required for deployment.
Ensure that you copy microsoft-windows-netfx3-ondemand-package to a folder first. Then paste both the scripts in the same folder. You can download them from here. It’s a zip and extract all of them and place it into sources folder.
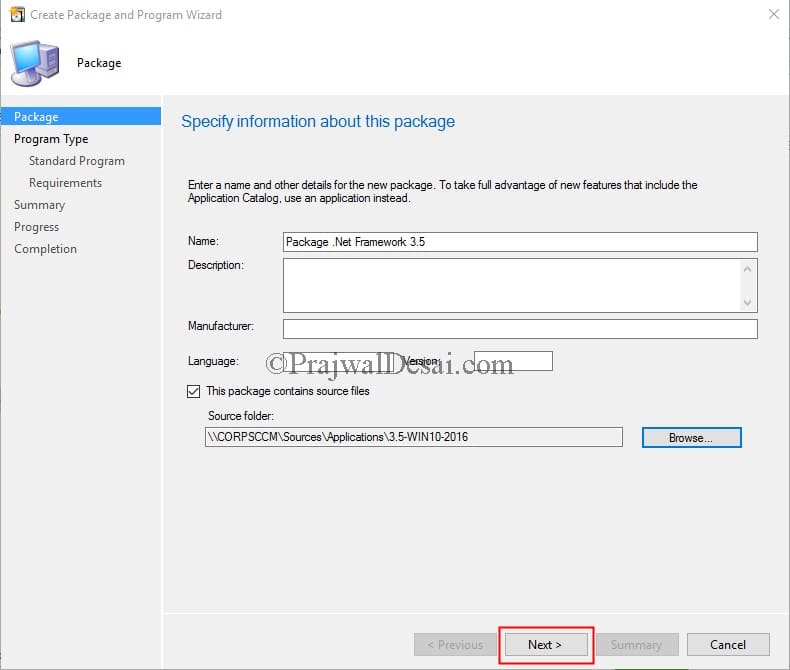
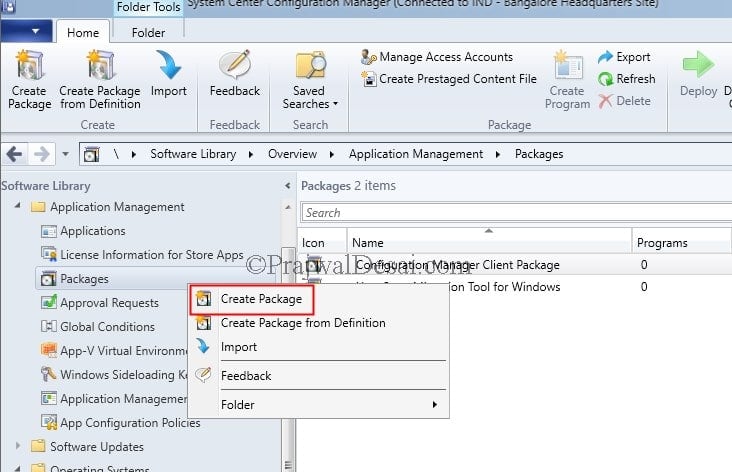
 Right click Packages and click Create Package.
Specify the name of the package and provide the path to source files. Click Next.
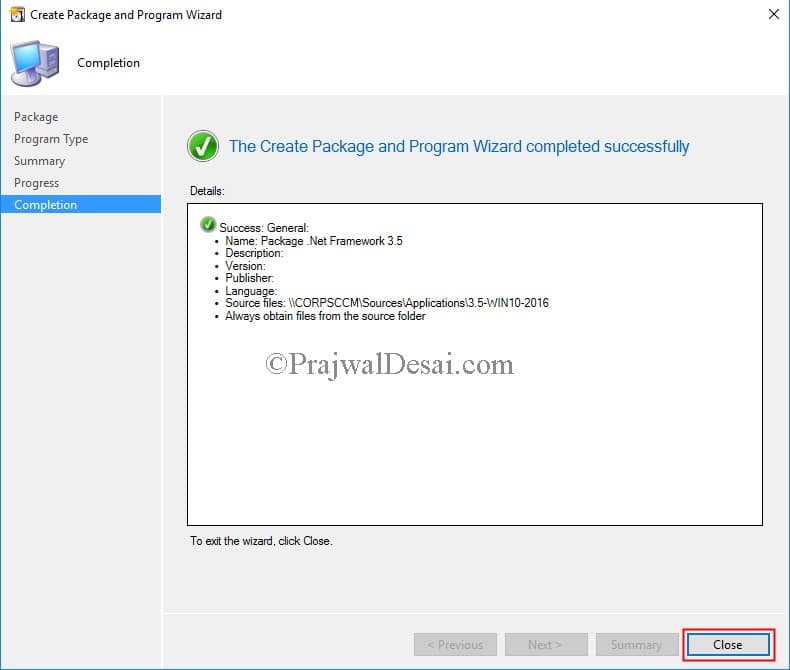
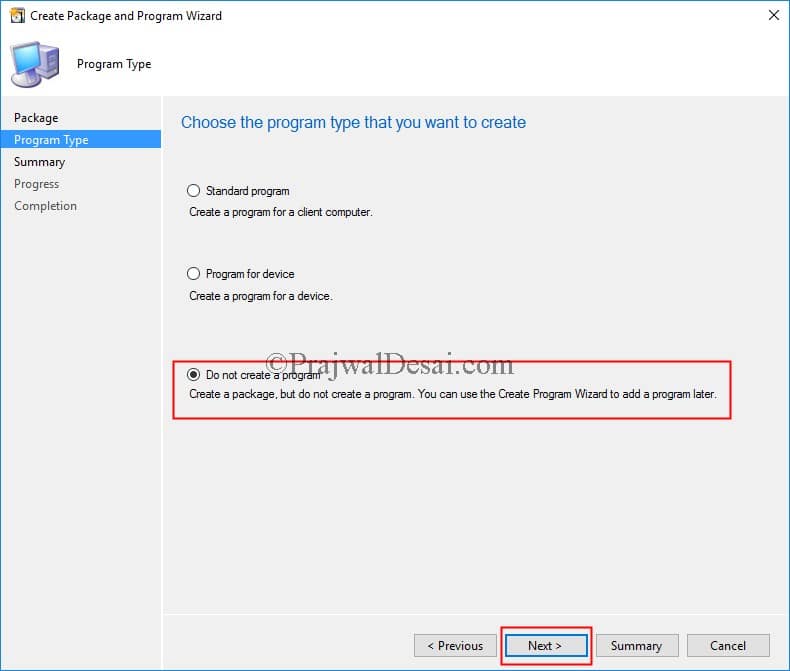
 Select Do not create a program. Click Next.
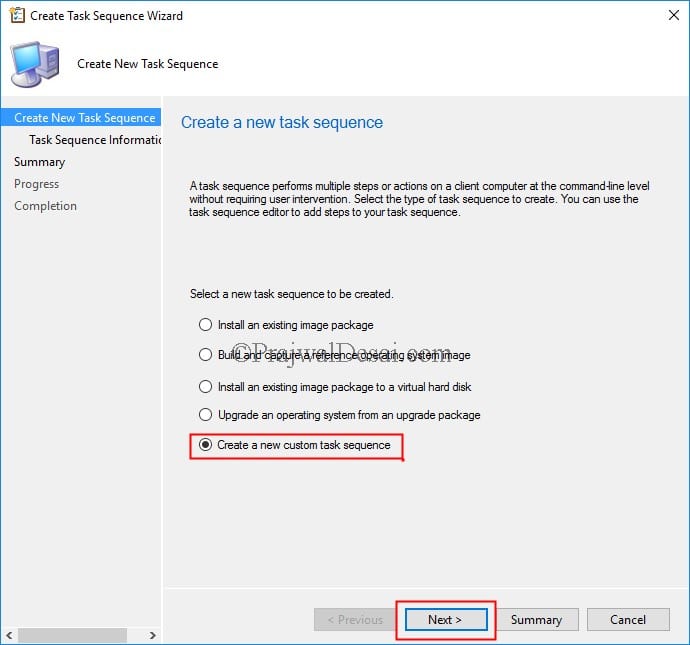
 Right click Task Sequences and click Create Task Sequence. Next select Create a new custom task sequence. Click Next.
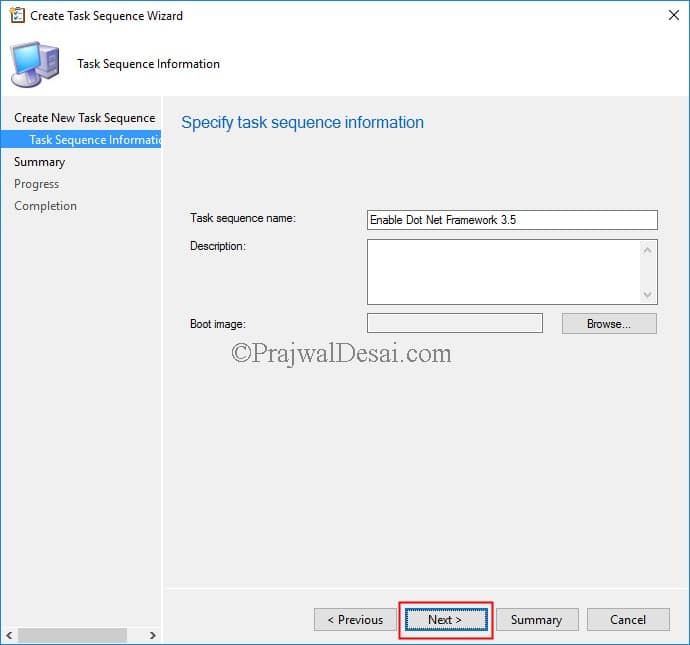
 Specify the Task Sequence name and click Next.
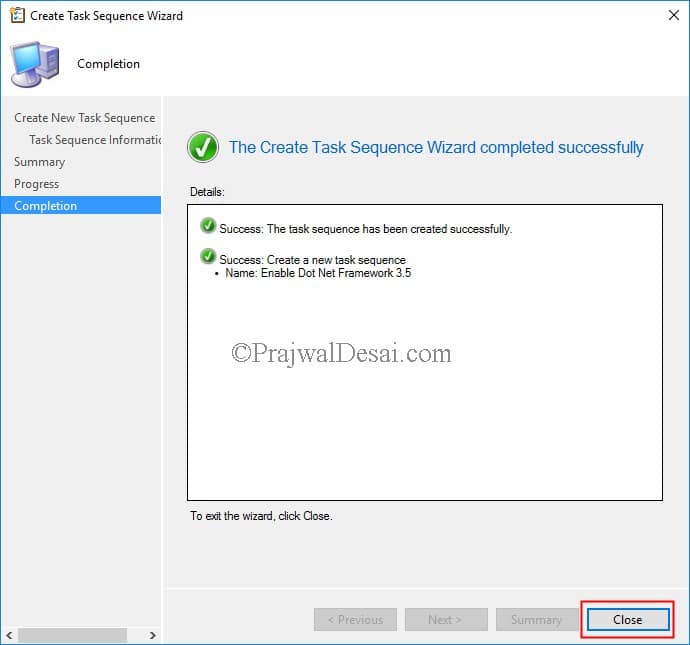
 On the completion page, click Close.
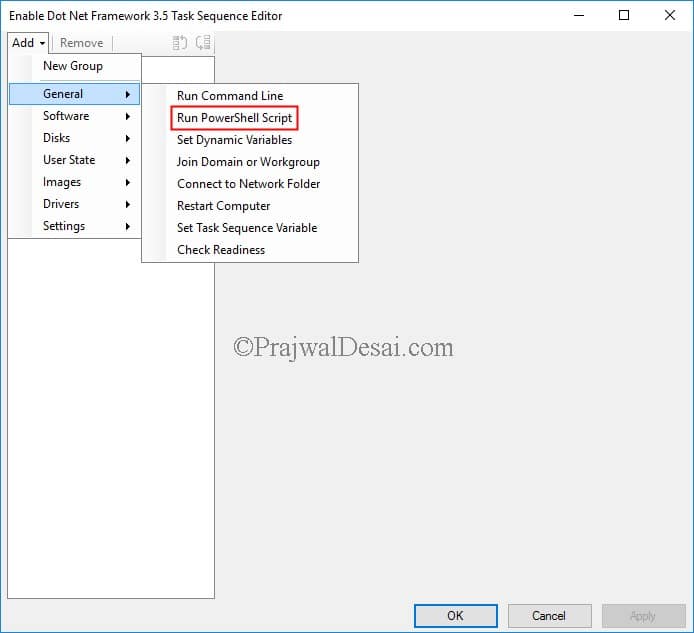
Right click and edit the task sequence. Click Add > General > Run PowerShell script.
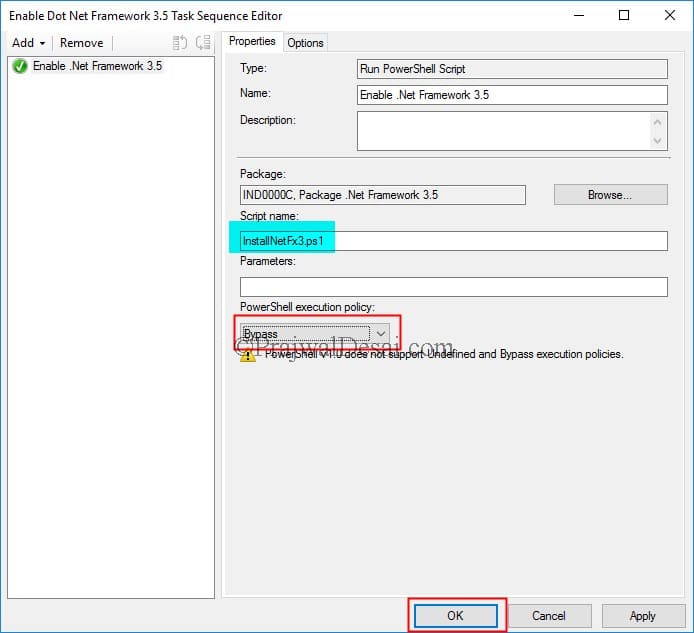
Provide the script name with extension. Ensure the PowerShell execution policy is set to Bypass. Click OK.
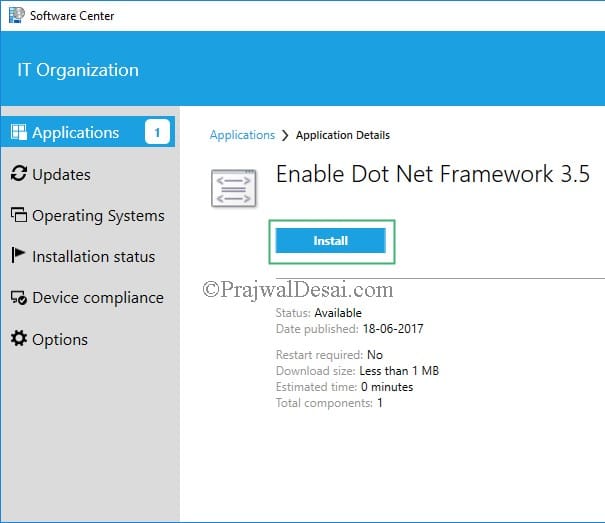
On the client computer refresh the software center. When you see the application click Install. The package is downloaded and installed.
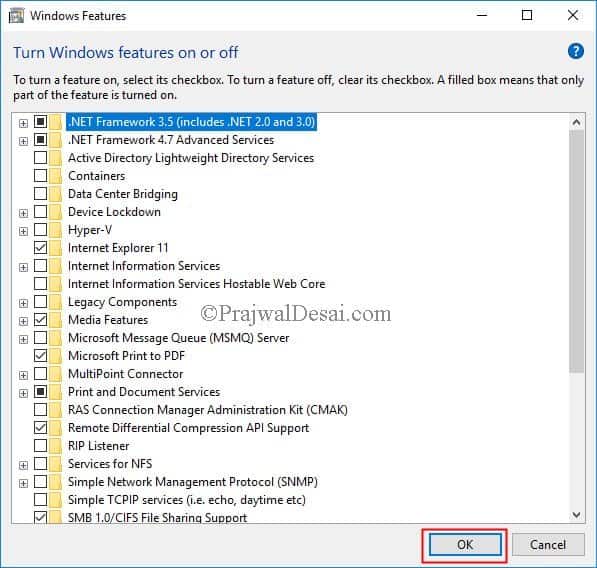
Finally you have found an easy way to enable .Net Framework 3.5 in Windows 10.
Video Tutorial :-

Tested on Win10 22H2, above worked. Thank you.
hi.
where is the bat file called?
Hi everyone,
Juste for information. (I passed long time to resolve versioning of Win10)
I make an application NetFx3.5 with this package as a deployment type.
I use a new personal Global condition for know the version of Windows with this script.
$Build = (Get-ItemProperty ‘HKLM:\SOFTWARE\Microsoft\Windows NT\CurrentVersion’ -Name CurrentBuild).CurrentBuild
switch ($Build) {
#Clients
“18363” { $OS = “Win10_1909” }
“19042” { $OS = “Win10_20H2” }
“19043” { $OS = “Win10_21H1” }
“19044” { $OS = “Win10_21H2” }
“22000” { $OS = “Win11_21H2” }
#Server
“14393” { $OS = “WinSrv_2016” }
“17763” { $OS = “WinSrv_2019” }
“20348” { $OS = “WinSrv_2022” }
#Default
Default { $OS = “Non”}
}
Write-Host $OS
And you just have to create one deployment type by version in your application. (and one
source folder by version)
It works fine for me
Thx Prajwal for this post (and all other)
Juste one more for all versions 😉
detection => registre
hive => HKLM
Key => SOFTWARE\Microsoft\NET Framework Setup\NDP\v3.5
Value => Install
have to existe
Did anyone find a method of applying .net 3.5 to a 1909 task sequence ?
you need to have the .net cab files from 1909 iso. If you use older ones it won’t work.
I’m having the exact same problem, Daniel. Won’t run in the machine build task sequence as I’ve always had it and it won’t auto after the machine has built. I have had it say ‘Success’, but nothing has happened. If I run the PowerShell manually it works. Which defies the point sadly.
Not working on 1909. The task sequence finishes without an error but nothing really happens.
I have the same issue
Same issue here. Has any of you been able to fix it?
Hi Prajwal,
Firstly I would like to thank you for taking the time to write this tutorial.
Secondly I would like to advise that I have tried this tutorial with Windows 10 v1903.
My results are that whilst Software Center shows .Net as having installed when I look at the Windows Features dialog ‘.Net Framework 3.5 (includes .NET 2.0 and 3.0)’ does not have a check in the box next to it. Due to this some apps don’t see .Net as having been installed.
Kind Regards,
Davo
So this no longer works, and I believe it’s due to the way Microsoft changed Get-WindowsFeature to Get-WindowsCapability. That said, I used a powershell script within SCCM – Add-WindowsCapability -Online -Name NetFx~~~~ -Source “\\Servername\Share” Within your share, copy from a windows ISO, Source\SXS
Works fine for me on my test lab.. Windows 10 1809…
For 1809
DISM /Online /Enable-Feature /FeatureName:NetFx3 /All /LimitAccess /Source:”\\sccm01\OSD\Apps\Sources\Microsoft\.Net 3.5″
I moved the sxs contents to the folder above (both .net cabs) and added that command to the task sequence after the PC has joined domain.
Cancel this comment, (I can’t?) just read about the name of the cab file below. Thank you!
Hi Prajwal,
I don’t have network connection for SCCM, i am using standalone media (USB) , how we can enable it & what will be the source location in this case ?
Hi, I’d like to advise using this process does work with the 1809 update. The issue why it will not work is the naming of the extracted CAB file. With the 1809 Windows media we have its called
microsoft-windows-netfx3-ondemand-package~31bf3856ad364e35~amd64~~
When the file is extracted, not renamed and the Online install batch file is edited to have the file reference there to have the same name as the actual file name, then the sequence when deploys, does enable .Net 3.5
I want to thank Prajwal Desai for his blog on SCCM. We have moved over to SCCM where I work. I constantly reference this blog as I struggle with fixing issues with it. As I do not have access to Group Policy I have to do what I can with packages in SCCM.
Thanks for this! one thing I would add is naming the package by the Windows 10 version the payload was obtained from as you have to recreate it for each new version. It’ll help track these things in future.
This does not work on Win 10 1809. TS works and complete successfully but does not enable Dot Net 3.5. Did you try on 1809.
I haven’t tested this on 1809 but when i get free time, I will surely do.
This is correct, the above works on 1803 but not 1809.
I created application to below script (InstallDotNet.cmd) and it is working. Place the related CAB in the same folder.
dism /online /Enable-Feature /FeatureName:NetFx3 /All /LimitAccess /Source:%~dp0 /NoRestart /Quiet
Detection method 1.
HKEY_LOCAL_MACHINESOFTWAREMicrosoftNET Framework SetupNDPv3.5
Install=1
Detection method 2
HKEY_LOCAL_MACHINESOFTWAREMicrosoftNET Framework SetupNDPv3.5
SP=1
Is is possible to do it using Application instead of Task Sequence…?
I used to do this before 1809. Do you know how to make it work in 1809?
Is it not working in 1810 ?.
No it is not.. any suggestion?
thank you
works perfect, thanks
Hi,
i’m having a problem with the script.
Enable-WindowsOptionalFeature : The source files could not be found.
Use the “Source” option to specify the location of the files that are required to restore the feature. For more
thank you
when i run the script manually i don’t get any error, but when the sccm deploys it. i receive this error
Enable-WindowsOptionalFeature : The source files could not be found.
Use the “Source” option to specify the location of the files that are required to restore the feature. For more
Hi, and thanks for all your good posts.
I also apply updates using SCCM, and .net 3.5 is available there. Would it be possible to enable .NET simply by running something like:
“Install-WindowsFeature Net-Framework-Core” in my TS?
This works perfectly, thanks. Is there any reason this couldn’t be done as an Application instead of a Package/Task Sequence? The reason I ask is the User Experience options for Software Center in Applications are better than Task Sequences. Specifically, if the Application is Required, you can Hide it from Software Center – I didn’t see that option in Task Sequences.
Perfect,, works as suggested
Can someone please answer Sam’s question. I would like to run as required instead of available as I have an application in OSD TS that needs this enabled.
you can apply it in your OSD task sequence as a step after
“applying operating system” step.
Can this be set as required instead of available to install without user interaction?
Worked perfectly!
I just wanted to say thank you for this tutorial and all of the tutorials that you have posted. They have all been incredibly helpful.
Thank you
How can I make a cab-package with the source files of .Net Framework 3.5 for Windows Server 2012 R2 to deploy it via SCCM?
You will find the cab file inside windows 10 DVD > sxs folder.
Hi Pradjwal!
were can i find the microsoft-windows-netfx3-ondemand-package?
I’m not understanting or i can’t find it.
Thanks for your help!
I found it! Thanks! 🙂
Whenever I add that package to download file, it’s been removed by third party dmca. So i won’t be including the package in download. Only Script will be available for download.
Works great. Thank you.
Thank you.
Hi Prajwal, great article, looking for applied this in my lab can you please update download link, looks like expired now
Please try now.
The install file has been removed.
Please try now.
Hi Prajwal, can you please upload the files again, they have been removed.
Please try now.
I am trying this on Fall Creators Update 1709. Do these files need to be updated?
My task sequence completes successfully but .NET 3.5 is not enabled, even after a reboot.
Can you confirm if the .NET 3.5 installation was attempted ?.
Gary,
I am trying the same thing on 1709. The Task Sequence completes successfully and I watched as it opened a new window to install .Net 3.5.
After it finished I checked to see if the box was checked on the “Turn Windows Features On and Off” and it was still unchanged. Did you ever get this resolved?
Thanks for a great blog but I am having issues with the task sequence failing
On examining the log it displays the following error
The argument ‘Install NetFX3.ps1’ to the -File parameter does not exist. Provide the path to an existing ‘.ps1’ file as an argument to the -File parameter.
Any help gratefully appreciated
Are you following exactly the same steps mentioned in the post ?. There might be an issue while accessing the path. Could you check that ?.
Yes I followed them exactly, and on the client PC the task sequence is copied to the folder C:\_SMSTaskSequence\Packages , does that not mean the path is correct?
My bad there was a typo in the ps1 path
Cool.. Glad to hear that it’s fixed now.
Ok it did finally appear in Software Center but then the task sequence failed (0xFFFD0000)
0XFFFD0000 translates to wrong PS path or probably there is some auth problem with the user account that runs this script. Check both of them.
When I refresh Software Center, nothing appears, any idea?
Ensure the software is distributed to the distribution point.
dropbox link doesnt work, could you please post the scripts?
Error (429)
This link is temporarily disabled. The person who shared it hit their daily limit of traffic or downloads. Learn about traffic limits.
I have updated the dropbox links except the .net framework 3.5. I will update it soon.
The link is updated. You can now download the script.
I´m using SCCM 2012 and in Task Sequence Editor is no option Run Powershell Script, just Run Command Line. How can I run ps1 file to enable .Net3.5? Thank for help
@Tomas Vetron the “Run Powershell Script” step in the Task Sequence Editor was added in 2012 R2. Can you upgrade to R2?
Hi Prajwal,
I´m using SCCM 2012 and in Task Sequence Editor there is no Run Powershell Script option, just Run Command Line. How can I run your ps1 file in Command Line option? Thank you for help. OP